What’s New in Kubernetes v1.24?
Kubernetes v1. 24 is almost here.
Read Now
No items found.
2022-04-22
Azure Kubernetes service (AKS) maintains your hosted Kubernetes environment, making it quick and easy to deploy and manage containerized applications without having a proficiency in container orchestration. It also eliminates the burden of ongoing Kubernetes operations and maintenance by provisioning, upgrading, and scaling resources on demand, without taking your applications offline. As a hosted Kubernetes service, Azure handles critical tasks like health monitoring and maintenance for you. The Kubernetes masters are managed by Azure. You only manage and maintain the agent nodes. In this guide we will be creating AKS clusters in the Azure portal with Azure CLI.
This guide is designed to help you get started with Azure Kubernetes Service (AKS).We will be using Azure CLI to setup the AKS cluster and host a multi-container application. This guide will walk through the steps to:
Prepare an application for AKSIn this section, we will clone an application source from GitHub, create a container image from the application code and launch container application in a local Docker environment.
Before we launch Kubernetes clusters we launch some docker containers from a code available on Github. This requires the following :
The sample application used in this guide is a basic voting app. The application consists of a front-end web component and a back-end Redis instance. The web component is packaged into a custom container image. The Redis instance uses an unmodified image from Docker Hub.Use git to clone the sample application to your development environment:

Inside the directory is the application source code, a pre-created Docker compose file, and a Kubernetes manifest file. These files are used throughout the tutorial set.
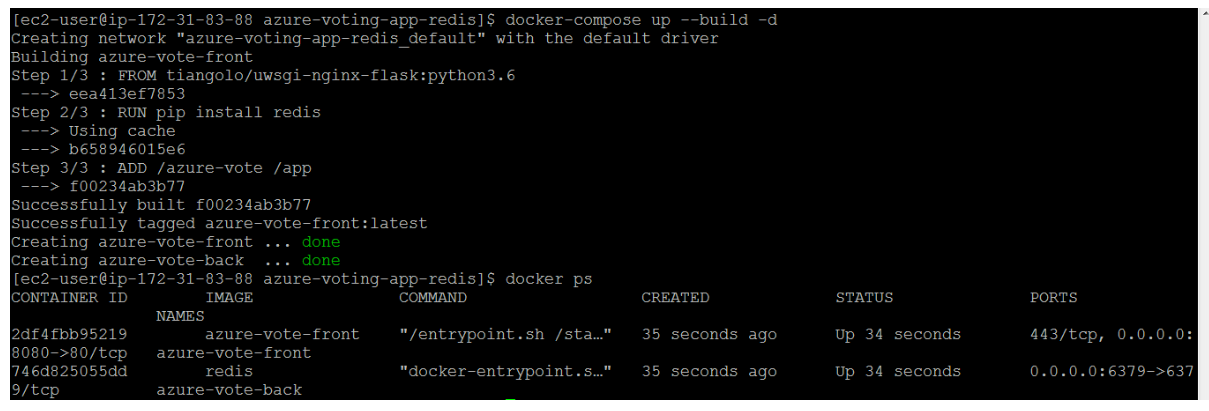
Docker Compose can be used to automate building container images and the deployment of multi-container applications.Use the sample docker-compose.yaml file to create the container image, download the Redis image, and start the application:
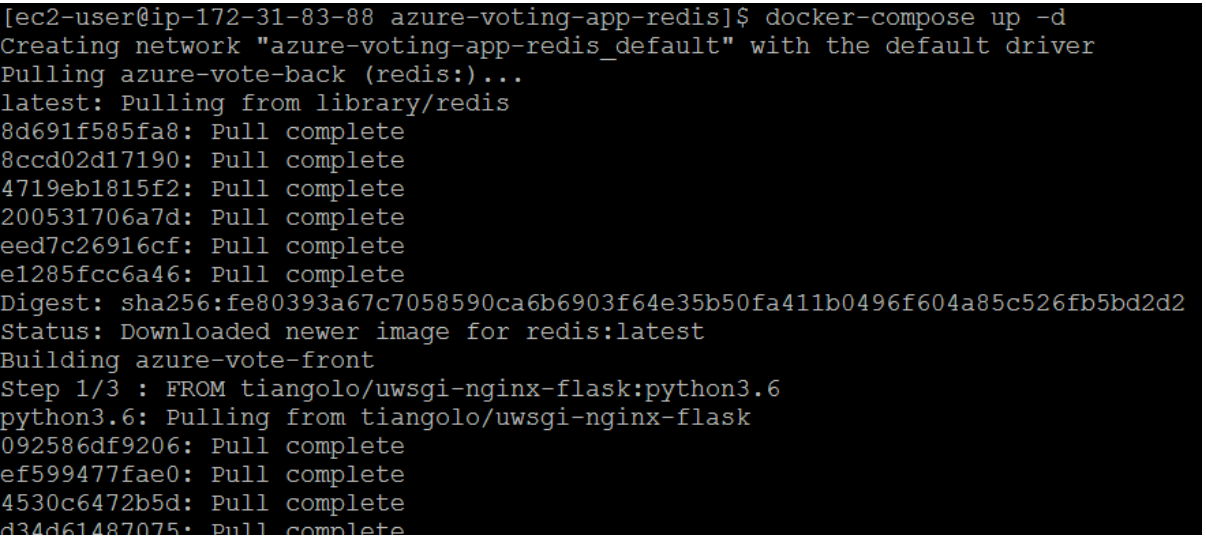
When completed, use the docker images command to see the created images. Three images have been downloaded or created. The azure-vote-front image contains the front-end application and uses the nginx-flask image as a base. The redis image is used to start a Redis instance. Run the docker ps command to see the running containers:

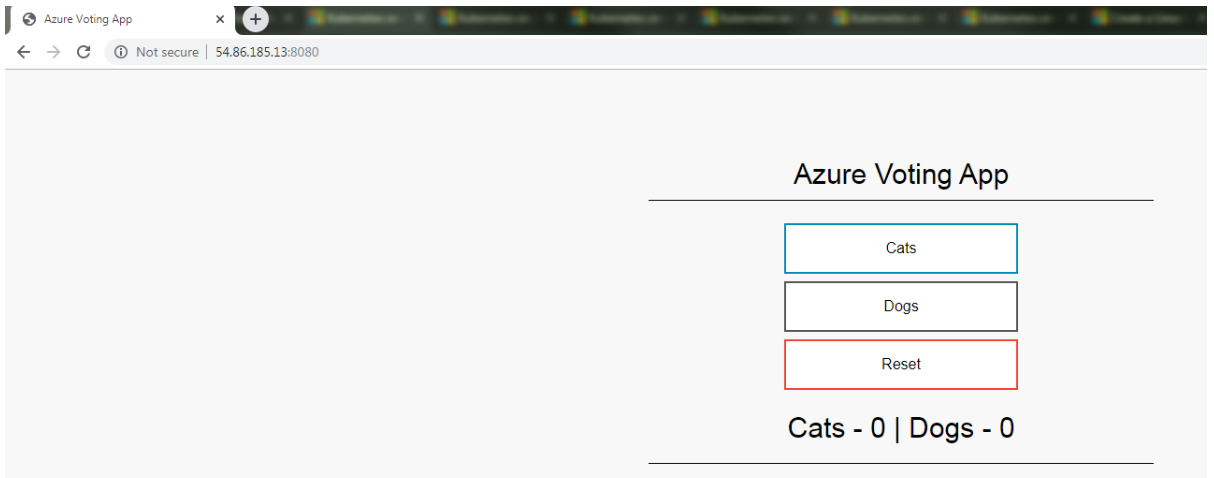
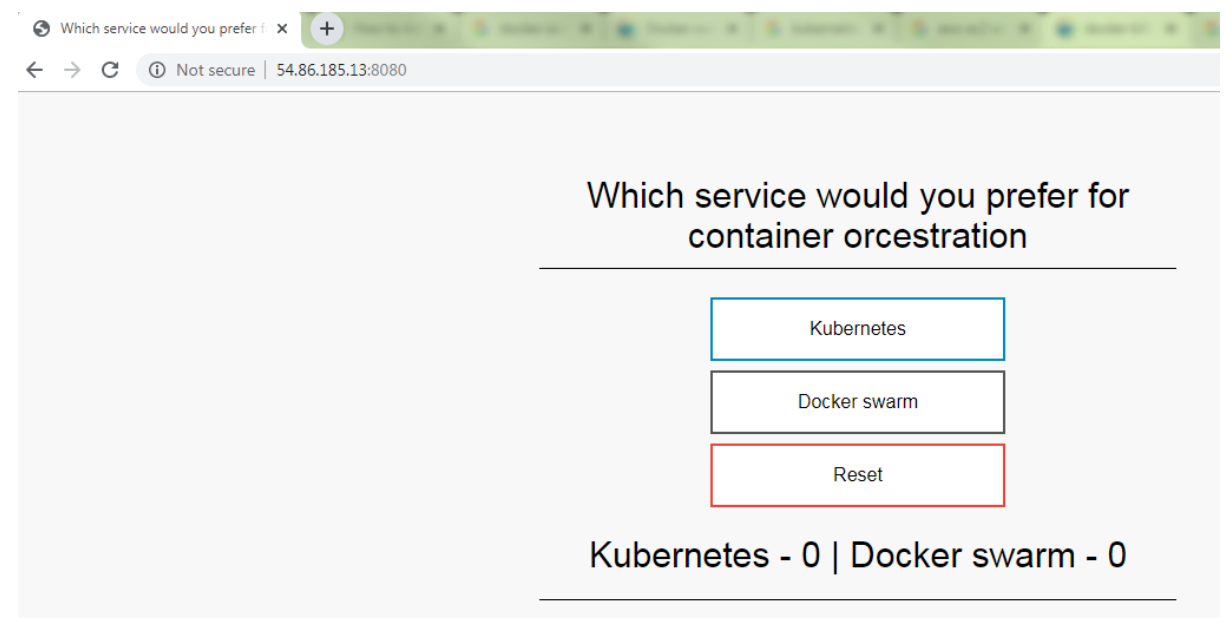
To see the running application, enter https://localhost:8080 in a local web browser. The sample application loads, as shown in the following example:
Now that the application's functionality has been validated, the running containers can be stopped and removed. We won’t be removing the images.

Azure Container Registry (ACR) is a private registry for container images. A private container registry lets you securely build and deploy your applications and custom code. In this tutorial, part two of seven, you deploy an ACR instance and push a container image to it.
To create an Azure Container Registry, you first need a resource group. An Azure resource group is a logical container into which Azure resources are deployed and managed.Create a resource group with the az group create command. In the following example, a resource group named myResourceGroup is created in the eastus region. You can also use the Azure cloud shell also.

Create an Azure Container Registry instance with the az acr create command and provide your own registry name. The registry name must be unique within Azure, and contain 5-50 alphanumeric characters.

To use the ACR instance, you must first log in. Use the az acr login command and provide the unique name given to the container registry in the previous step.

To see a list of your current local images, use the docker images command:

To use the azure-vote-front container image with ACR, the image needs to be tagged with the login server address of your registry. This tag is used for routing when pushing container images to an image registry.To get the login server address, use the az acr list command and query for the loginServer as follows:
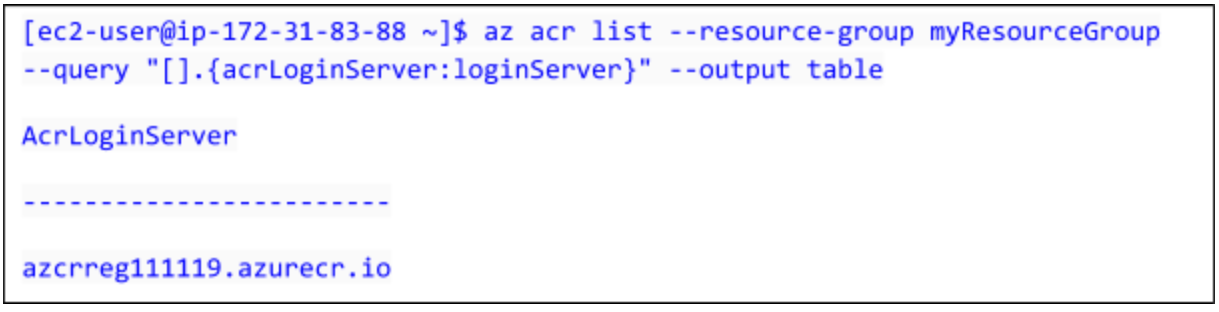

Now, tag your local azure-vote-front image with the acrloginServer address of the container registry. To indicate the image version, add :v1 to the end of the image name and to verify the tags are applied, run docker images again. An image is tagged with the ACR instance address and a version number.

With your image built and tagged, push the azure-vote-front image to your ACR instance. Use docker push and provide your own acrLoginServer address for the image name as follows:

It may take a few minutes to complete the image push to ACR.
To return a list of images that have been pushed to your ACR instance, use the az acr repository list command. The following example output lists the azure-vote-front image as available in the registry:

To see the tags for a specific image, use the az acr repository show-tags command as follows:

You now have a container image that is stored in a private Azure Container Registry instance. This image will be deployed from ACR to Kubernetes cluster in the next steps.
Kubernetes provides a distributed platform for containerized applications. With AKS, you can quickly create a production ready Kubernetes cluster. In this section, we will create a Kubernetes cluster.
Create an AKS cluster using az aks create. The following example creates a cluster named myAKSCluster in the resource group named myResourceGroup. It creates two nodes and copies the public key to the nodes.
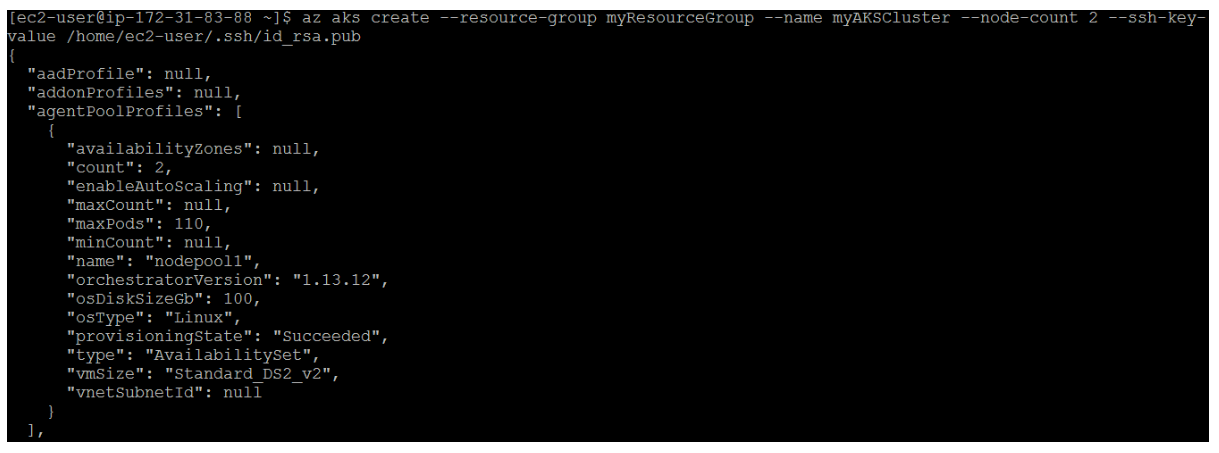
To connect to the Kubernetes cluster from your local computer, you use kubectl, the Kubernetes command-line client. You can also install it locally using the az aks install-cli command:

To configure kubectl to connect to your Kubernetes cluster, use the az aks get-credentials command. The following example gets credentials for the AKS cluster named myAKSCluster in the myResourceGroup:

To verify the connection to your cluster, run the kubectl get nodes command:

The output will show two nodes which we have initiated while creating the cluster.
Kubernetes provides a distributed platform for containerized applications. You build and deploy your own applications and services into a Kubernetes cluster, and let the cluster manage the availability and connectivity. In this section, we will deploy our application in kubernetes (K8s) cluster from the azure-voting-app image which we uploaded in the azure container registry.
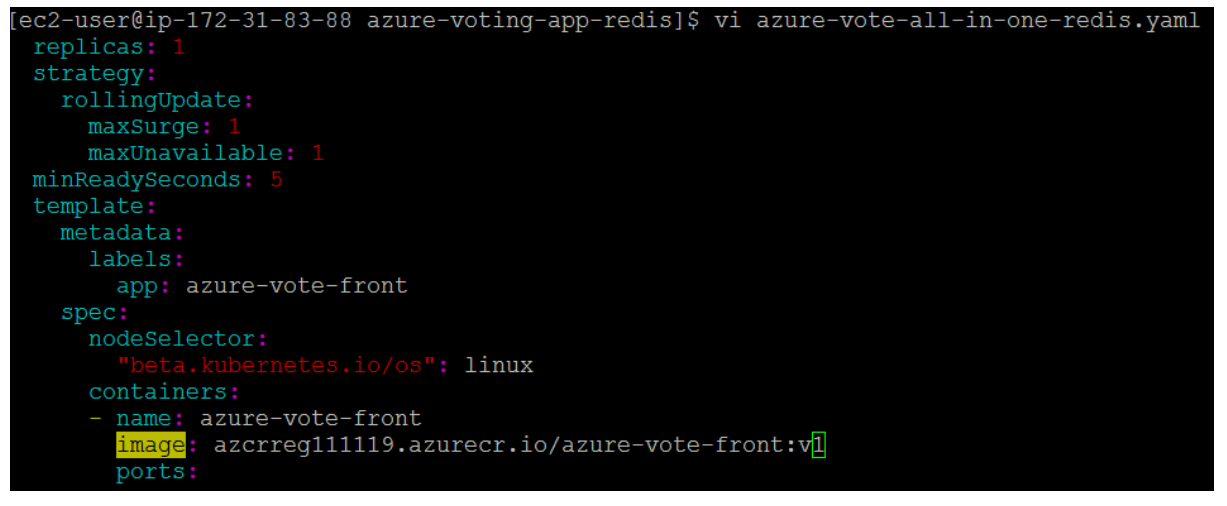
To deploy the application, you must update the image name in the Kubernetes manifest file to include the ACR login server name.The sample manifest file from the git repo cloned in the first tutorial uses the login server name of microsoft. Make sure that you're in the cloned azure-voting-app-redis directory, then open the manifest file with a text editor, such as vi:

Replace microsoft with your ACR login server name. The image name is found on line 51 of the manifest file. The following example shows the default image name:

Save and close the file. In vi, use :wq.
To deploy your application, use the kubectl apply command. This command parses the manifest file and creates the defined Kubernetes objects. Specify the sample manifest file, as shown in the following example:

When the application runs, a Kubernetes service exposes the application front end to the internet. This process can take a few minutes to complete.

To monitor progress, use the kubectl get service command with the –watch argument. When the EXTERNAL-IP address changes from pending to an actual public IP address, use CTRL-C to stop the kubectl watch process. The following example output shows a valid public IP address assigned to the service:

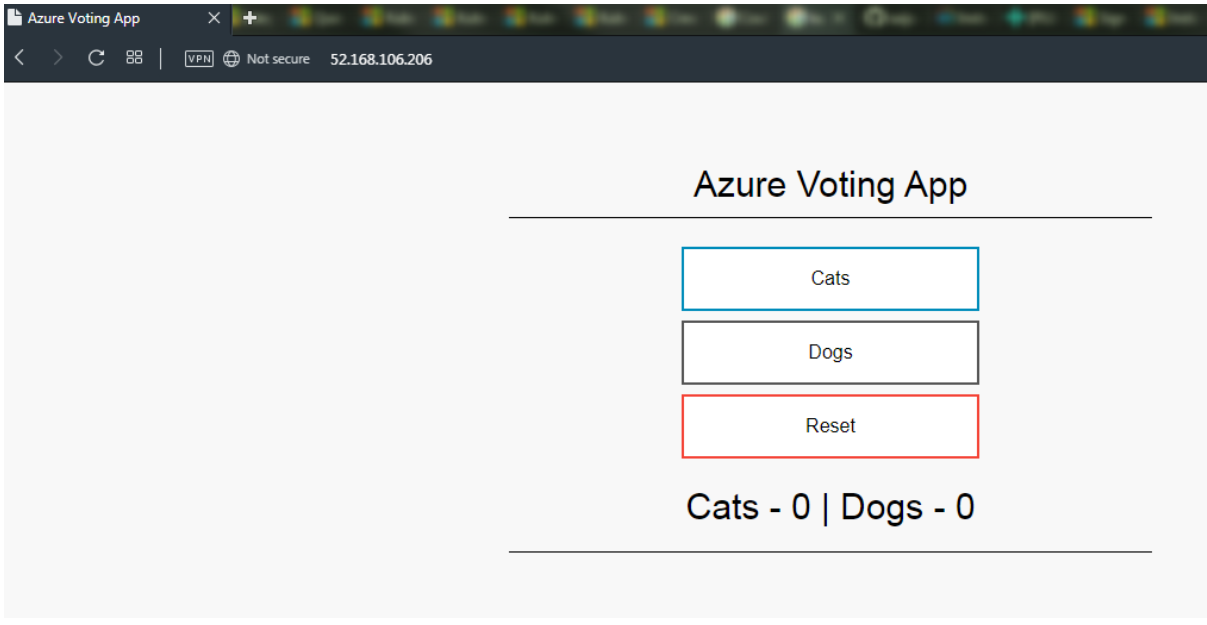
To see the application in action, open a web browser to the external IP address of your service:
In this section, we will scale application the application horizontally and vertically according to different parameters.
When the Azure Vote front-end and Redis instance were deployed, a single replica was created. To see the number and state of pods in your cluster run the following command.

The output shows one front-end pod and one back-end pod. To manually change the number of pods in the azure-vote-front deployment, use the kubectl scale command. The following example increases the number of front-end pods to 5.

Run kubectl get pods again to verify that AKS creates the additional pods. After a minute or so, the additional pods are available in your cluster:

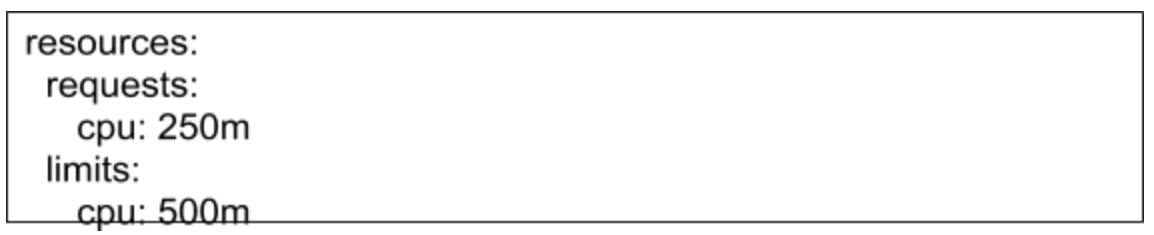
Kubernetes supports horizontal pod autoscaling to adjust the number of pods in a deployment depending on CPU utilization or other select metrics. The Metrics Server is used to provide resource utilization to Kubernetes, and is automatically deployed in AKS clusters versions 1.10 and higher.To use the autoscaler, all containers in your pods and your pods must have CPU requests and limits defined. In the azure-vote-front deployment, the front-end container already requests 0.25 CPU, with a limit of 0.5 CPU. These resource requests and limits are defined as shown in the following example snippet:
The following example uses the kubectl autoscale command to autoscale the number of pods in the azure-vote-front deployment. If average CPU utilization across all pods exceeds 50% of their requested usage, the autoscaler increases the pods up to a maximum of 10 instances. A minimum of 3 instances is then defined for the deployment:

To see the status of the autoscaler, use the kubectl get hpa command as follows:

After a few minutes, with minimal load on the Azure Vote app, the number of pod replicas decreases automatically to three. You can use kubectl get pods again to see the unneeded pods being removed.
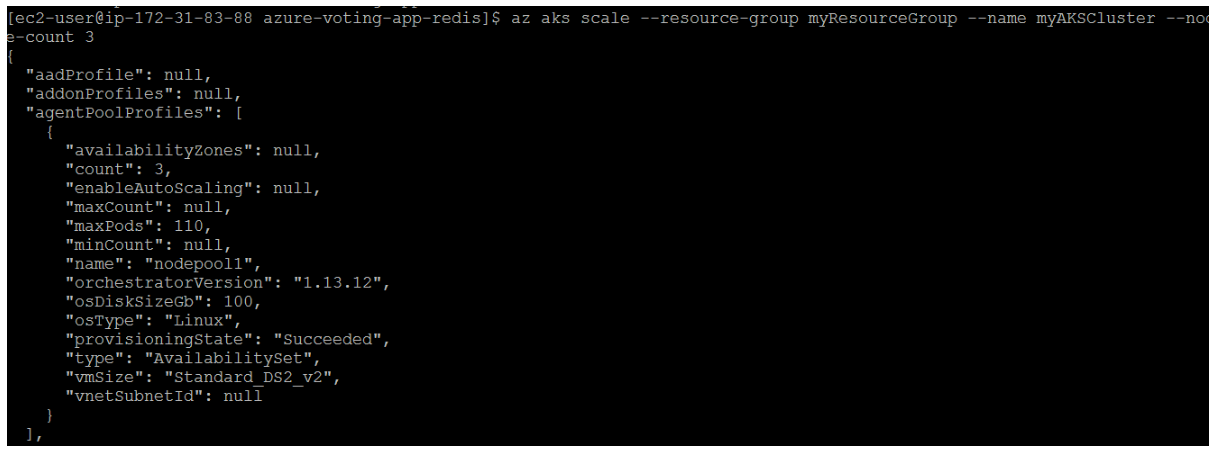
The following example increases the number of nodes to three in the Kubernetes cluster named myAKSCluster.
In this section, we will update the code , run docker compose to update the application with new updated code.
Let's make a change to the sample application, then update the version already deployed to your AKS cluster. Make sure that you're in the cloned azure-voting-app-redis directory. The sample application source code can then be found inside the azure-vote directory. Open the config_file.cfg file with an editor, such as vi:
Change the values for VOTE1VALUE and VOTE2VALUE:

Save and close the file. In vi, use :wq.
To re-create the front-end image and test the updated application, use docker-compose. The --build argument is used to instruct Docker Compose to re-create the application image:
To verify that the updated container image shows your changes, open a local web browser to https://localhost:8080.
Before you integrate Jenkins and AKS for automated deployments, first manually prepare and deploy the Azure vote application to your AKS cluster. Then we need to tag the image and upload it to Azure container registry.
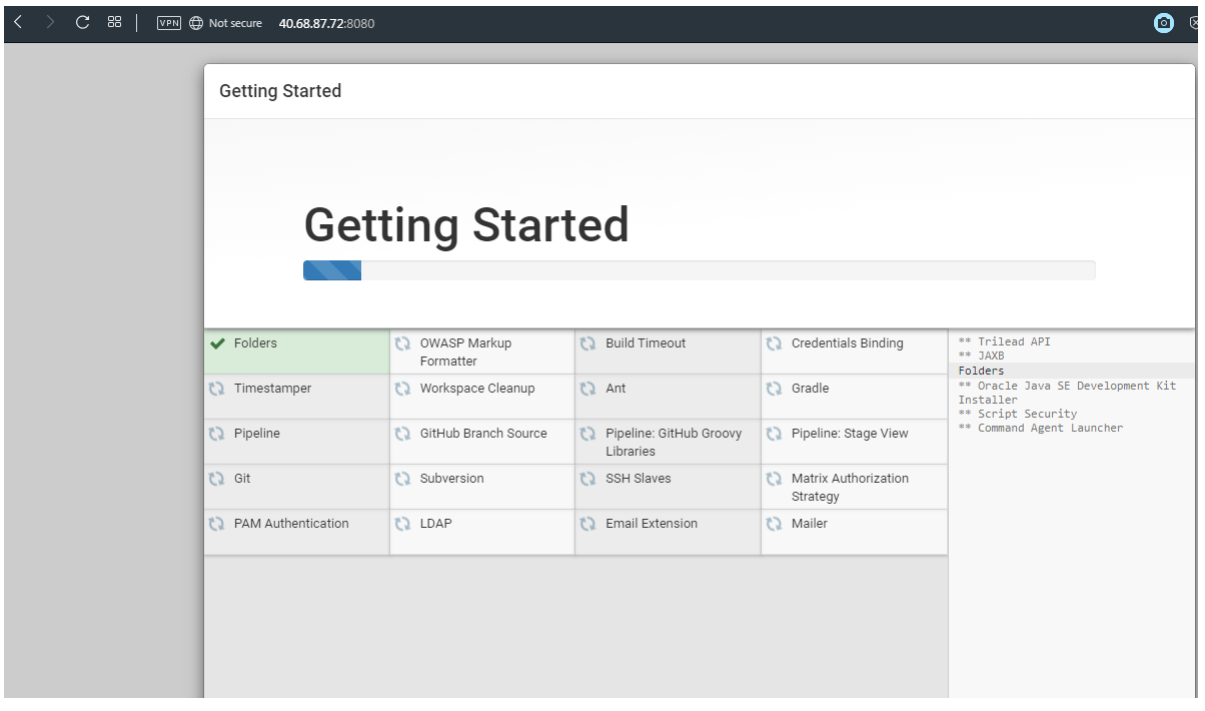
To quickly deploy Jenkins , you can use the following script to deploy an Azure virtual machine, configure network access, and complete a basic installation of Jenkins. For authentication between Jenkins and the AKS cluster, the script copies your Kubernetes configuration file from your development system to the Jenkins system.Run the following commands to download and run the script.

It takes a few minutes to create the VM and deploy the required components for Docker and Jenkins. When the script has completed, it outputs an address for the Jenkins server and a key to unlock the dashboard, as shown in the following example output:
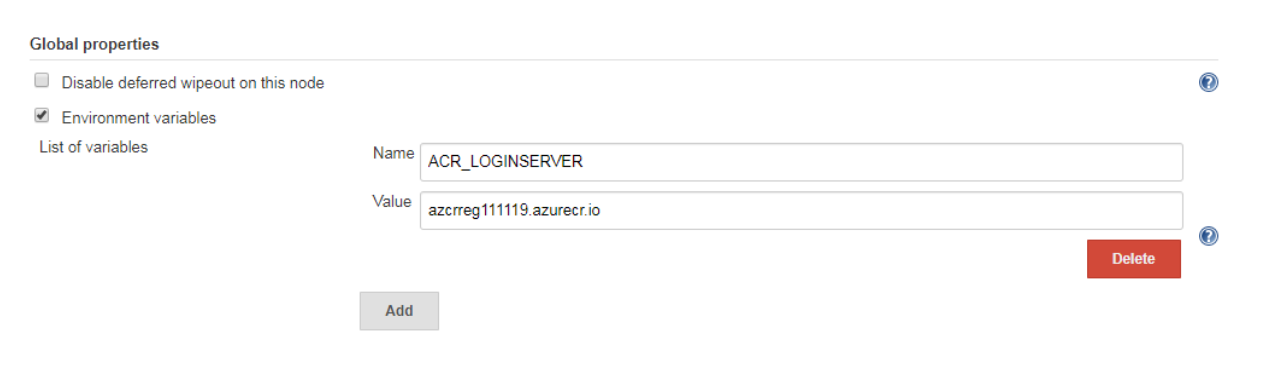
A Jenkins environment variable is used to hold the ACR login server name. This variable is referenced during the Jenkins build job. To create this environment variable, complete the following steps:On the left-hand side of the Jenkins portal, select Manage Jenkins > Configure SystemUnder Global Properties, select Environment variables. Add a variable with the name ACR_LOGINSERVER and the value of your ACR login server.
To allow Jenkins to build and then push updated container images to ACR, you need to specify credentials for ACR. This authentication can use Azure Active Directory service principals. In the pre-requisites, you configured the service principal for your AKS cluster with Reader permissions to your ACR registry. These permissions allow the AKS cluster to pull images from the ACR registry. During the CI/CD process, Jenkins builds new container images based on application updates, and needs to then push those images to the ACR registry. For separation of roles and permissions, now configure a service principal for Jenkins with Contributor permissions to your ACR registry.First, create a service principal using the az ad sp create-for-rbac command:
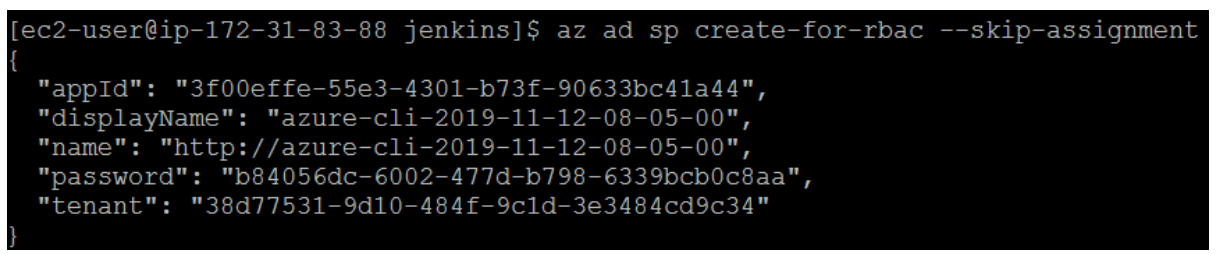
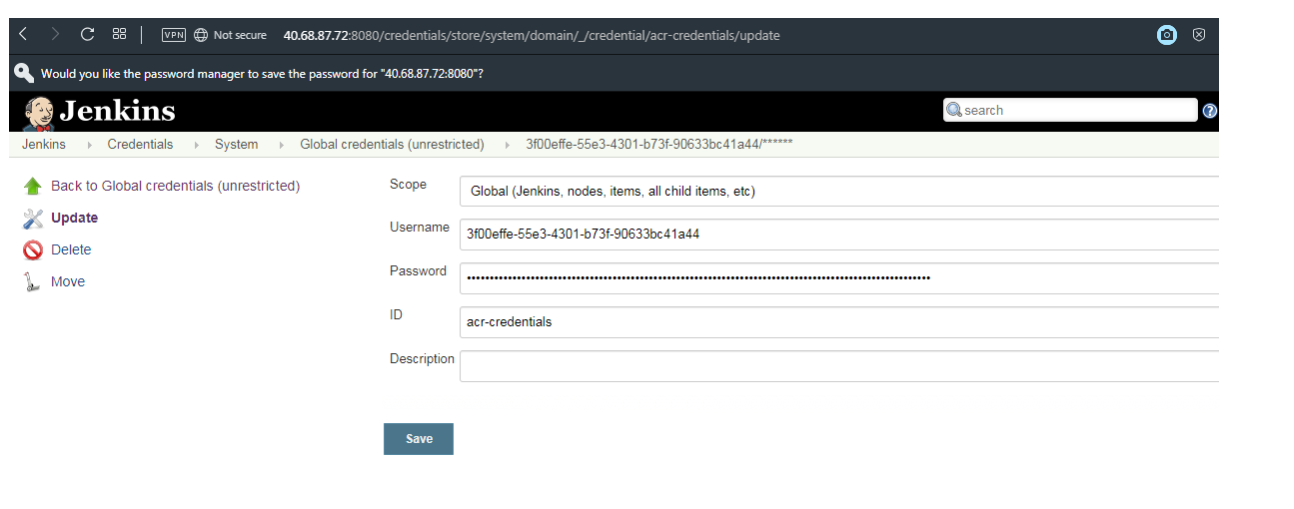
Make a note of the appID and password shown in your output. These values are used in following steps to configure the credential resource in Jenkins.Get the resource ID of your ACR registry using the az acr show command, and store it as a variable. Provide your resource group name and ACR name:

Now create a role assignment to assign the service principal Contributor rights to the ACR registry. In the following example, provide your own appId shown in the output a previous command to create the service principal:

Before you automate the job based on GitHub commits, first manually test the Jenkins build. This manual build validates that the job has been correctly configured, the proper Kubernetes authentication file is in place, and that the authentication with ACR works.On the left-hand menu of the project, select Build Now.

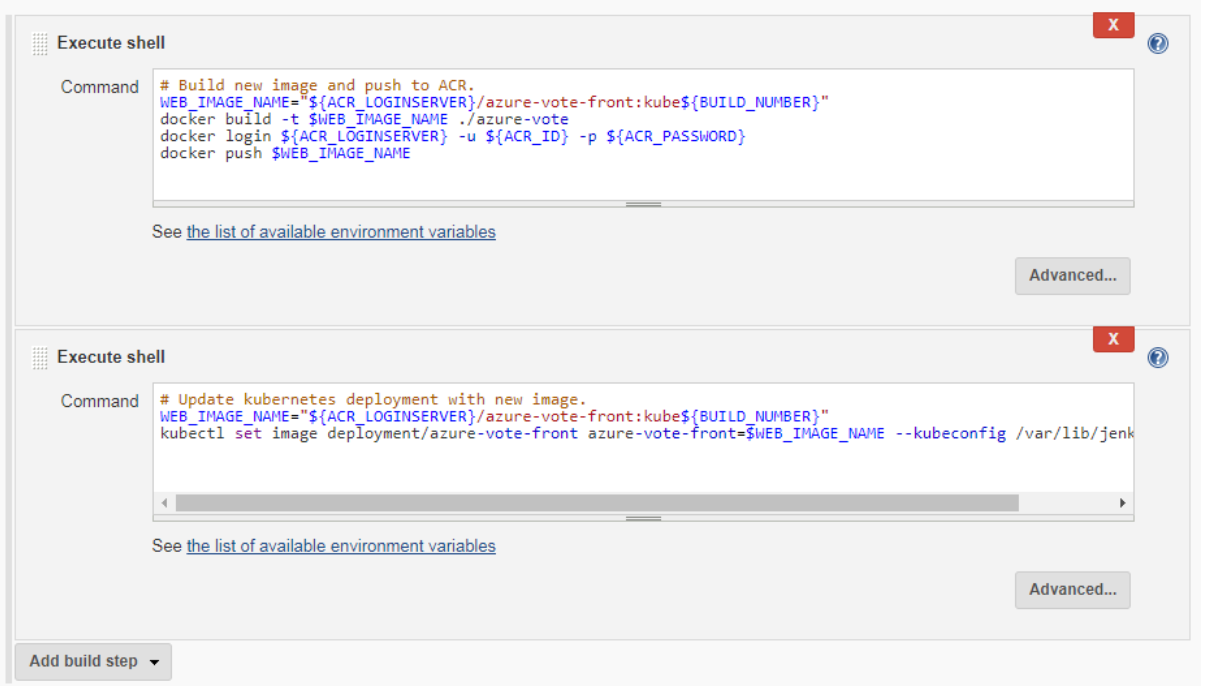
The first build takes a minute or two as the Docker image layers are pulled down to the Jenkins server. Subsequent builds can use the cached image layers to improve the build times.During the build process, the GitHub repository is cloned to the Jenkins build server. A new container image is built and pushed to the ACR registry. Finally, the Azure vote application running on the AKS cluster is updated to use the new image. Because no changes have been made to the application code, the application is not changed if you view the sample app in a web browser.Once the build job is complete, click on build #1 under build history. Select Console Output and view the output from the build process. The final line should indicate a successful build.
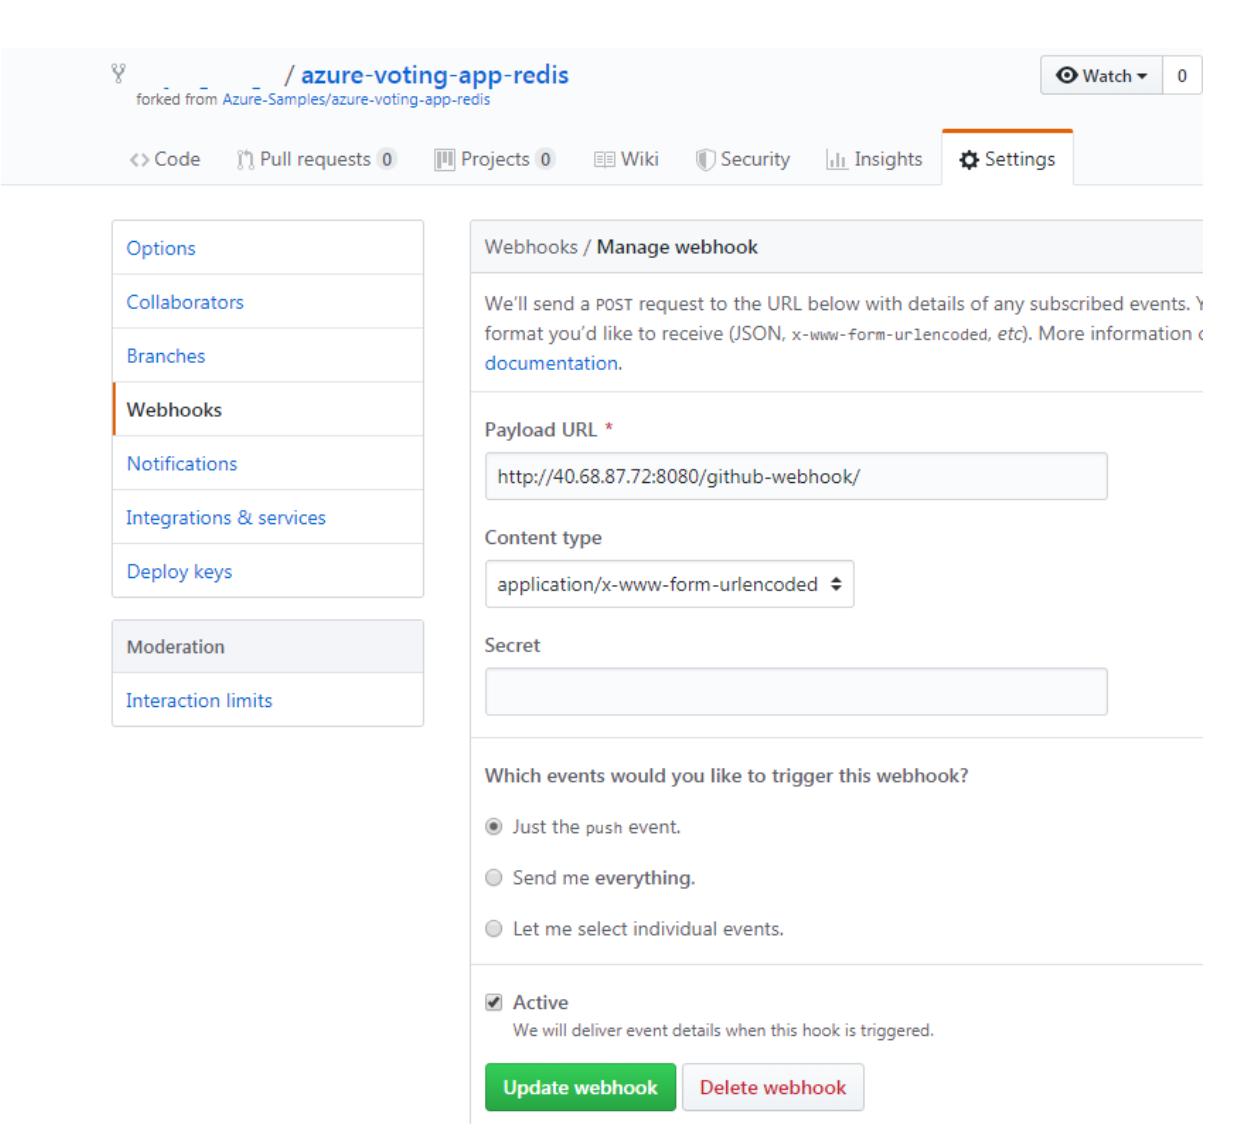
With a successful manual build complete, now integrate GitHub into the Jenkins build. A webhook can be used to run the Jenkins build job each time a code commit is made in GitHub. To create the GitHub webhook, complete the following steps:Browse to your forked GitHub repository in a web browser.Select Settings, then select Webhooks on the left-hand side.Choose to Add webhook. For the Payload URL, enter https://<publicIp:8080>/github-webhook/, where <publicIp> is the IP address of the Jenkins server. Make sure to include the trailing /. Leave the other defaults for content type and to trigger on push events.Select Add webhook.
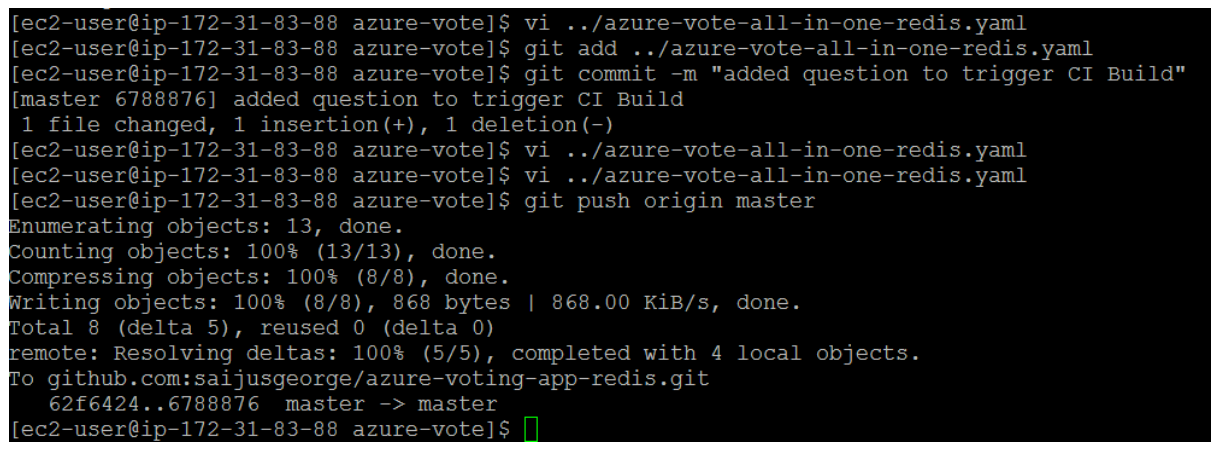
Now you can test the whole CI/CD pipeline. When you push a code commit to GitHub, the following steps happen:The GitHub webhook reaches out to Jenkins.Jenkins starts the build job and pulls the latest code commit from GitHub.A Docker build is started using the updated code, and the new container image is tagged with the latest build number.This new container image is pushed to Azure Container Registry.Your application deployed to Azure Kubernetes Service updates with the latest container image from the Azure Container Registry registry.On your development machine, open up the cloned application with a code editor. Under the /azure-vote/azure-vote directory, open the file named config_file.cfg. Update the vote values in this file to something other than cats and dogs, as shown in the following example:

When updated, save the file, commit the changes, and push these to your fork of the GitHub repository. The GitHub webhook triggers a new build job in Jenkins. In the Jenkins web dashboard, monitor the build process. It takes a few seconds to pull the latest code, create and push the updated image, and deploy the updated application in AKS.
This will trigger the Jenkins Pipeline.

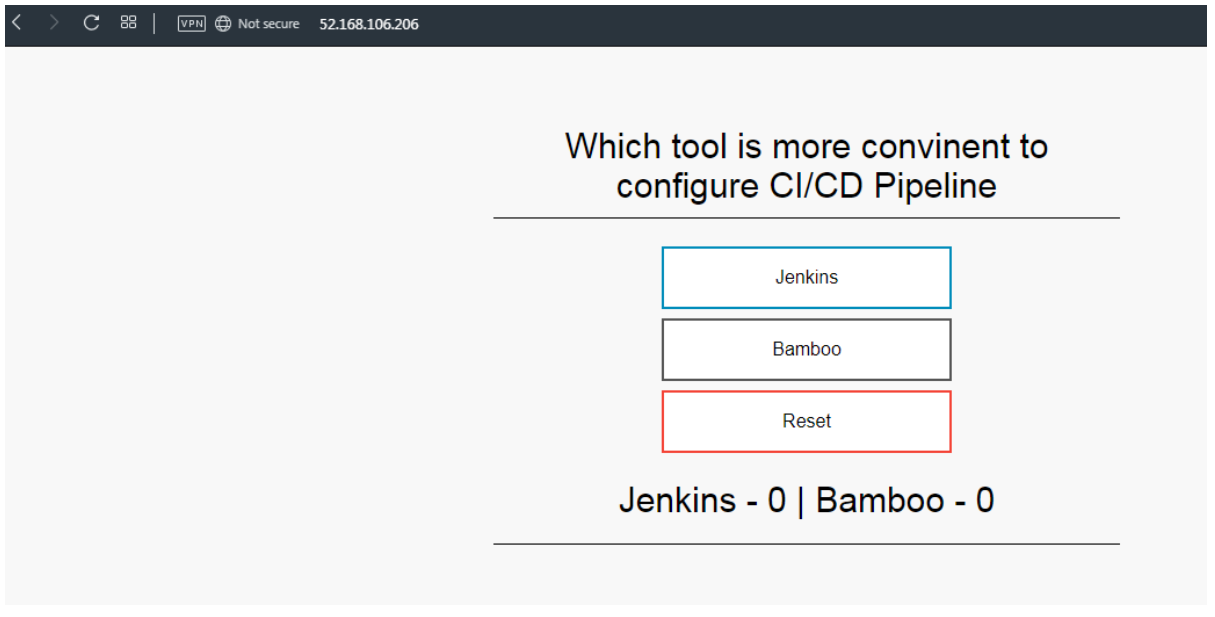
Once the build is complete, refresh your web browser of the sample Azure vote application. Your changes are displayed, as shown in the following example:
In this guide you have seen how easily we build an AKS cluster on Azure environment. AKS offers a platform for managing your containers across a variety of operating environments, significantly reducing the time necessary to build, deploy, and scale them. As an open source next-generation virtualization tool, Azure Kubernetes service provides you with all the functionality you need to optimize containerization usage with your existing IT resources.

Rafay Systems has been recognized as a Representative Vendor in the 2022 Gartner® Market Guide for Container Management Rafay Systems has been recognized as a Representative Vendor in the 2022 Gartner® Market Guide for Container Management. * We believe that being included in this market guide report underscores that Rafay’s global customer base and Infrastructure and Operations (I&O) teams recognize value in the company’s unique approach for operating Kubernetes infrastructure and modern, containerized applications.
Read Now

Developers love containerization, and Kubernetes (K8s) is the best open-source system for deploying and managing multi-container applications at scale. However, a significant challenge is choosing the best managed Kubernetes service for your application development.
Read Now