This blog demonstrates how to leverage Dynamic Resource Allocation (DRA) for efficient GPU allocation using Multi-Instance GPU (MIG) strategy on Rafay's Managed Kubernetes Service (MKS) running Kubernetes 1.34.
In our previous blog series, we covered various aspects of Dynamic Resource Allocation (DRA) in Kubernetes:
With Kubernetes 1.34, Dynamic Resource Allocation (DRA) is Generally Available (GA) and enabled by default on MKS clusters. This means you can immediately start using DRA features without additional configuration.
Prerequisites
Before we begin, ensure you have:
A Rafay MKS cluster running Kubernetes 1.34 (see MKS v1.34 Blog)
GPU nodes with compatible NVIDIA GPUs (A100, H100, or similar MIG-capable GPUs)
Container Device Interface (CDI) enabled (automatically enabled in MKS for Kubernetes 1.34)
Basic understanding of Dynamic Resource Allocation concepts (covered in our previous blog series)
Active Rafay account with appropriate permissions to manage MKS clusters and addons
Setting Up DRA and GPU Support on MKS
This section walks you through installing the necessary components to enable DRA for GPU allocation on your MKS cluster. We'll use Rafay's blueprint workflow to deploy both the DRA driver and GPU operator.
Understanding the Components
Before we begin, let's understand what we're installing:
DRA Driver: Enables dynamic resource allocation for GPUs
GPU Operator: Manages NVIDIA GPU drivers and MIG configuration
Blueprint: Rafay's way to manage cluster addons
The current DRA driver implementation doesn't include all GPU functionality. Advanced features like MIG management require the GPU operator to be deployed separately. This will be integrated in future DRA releases.
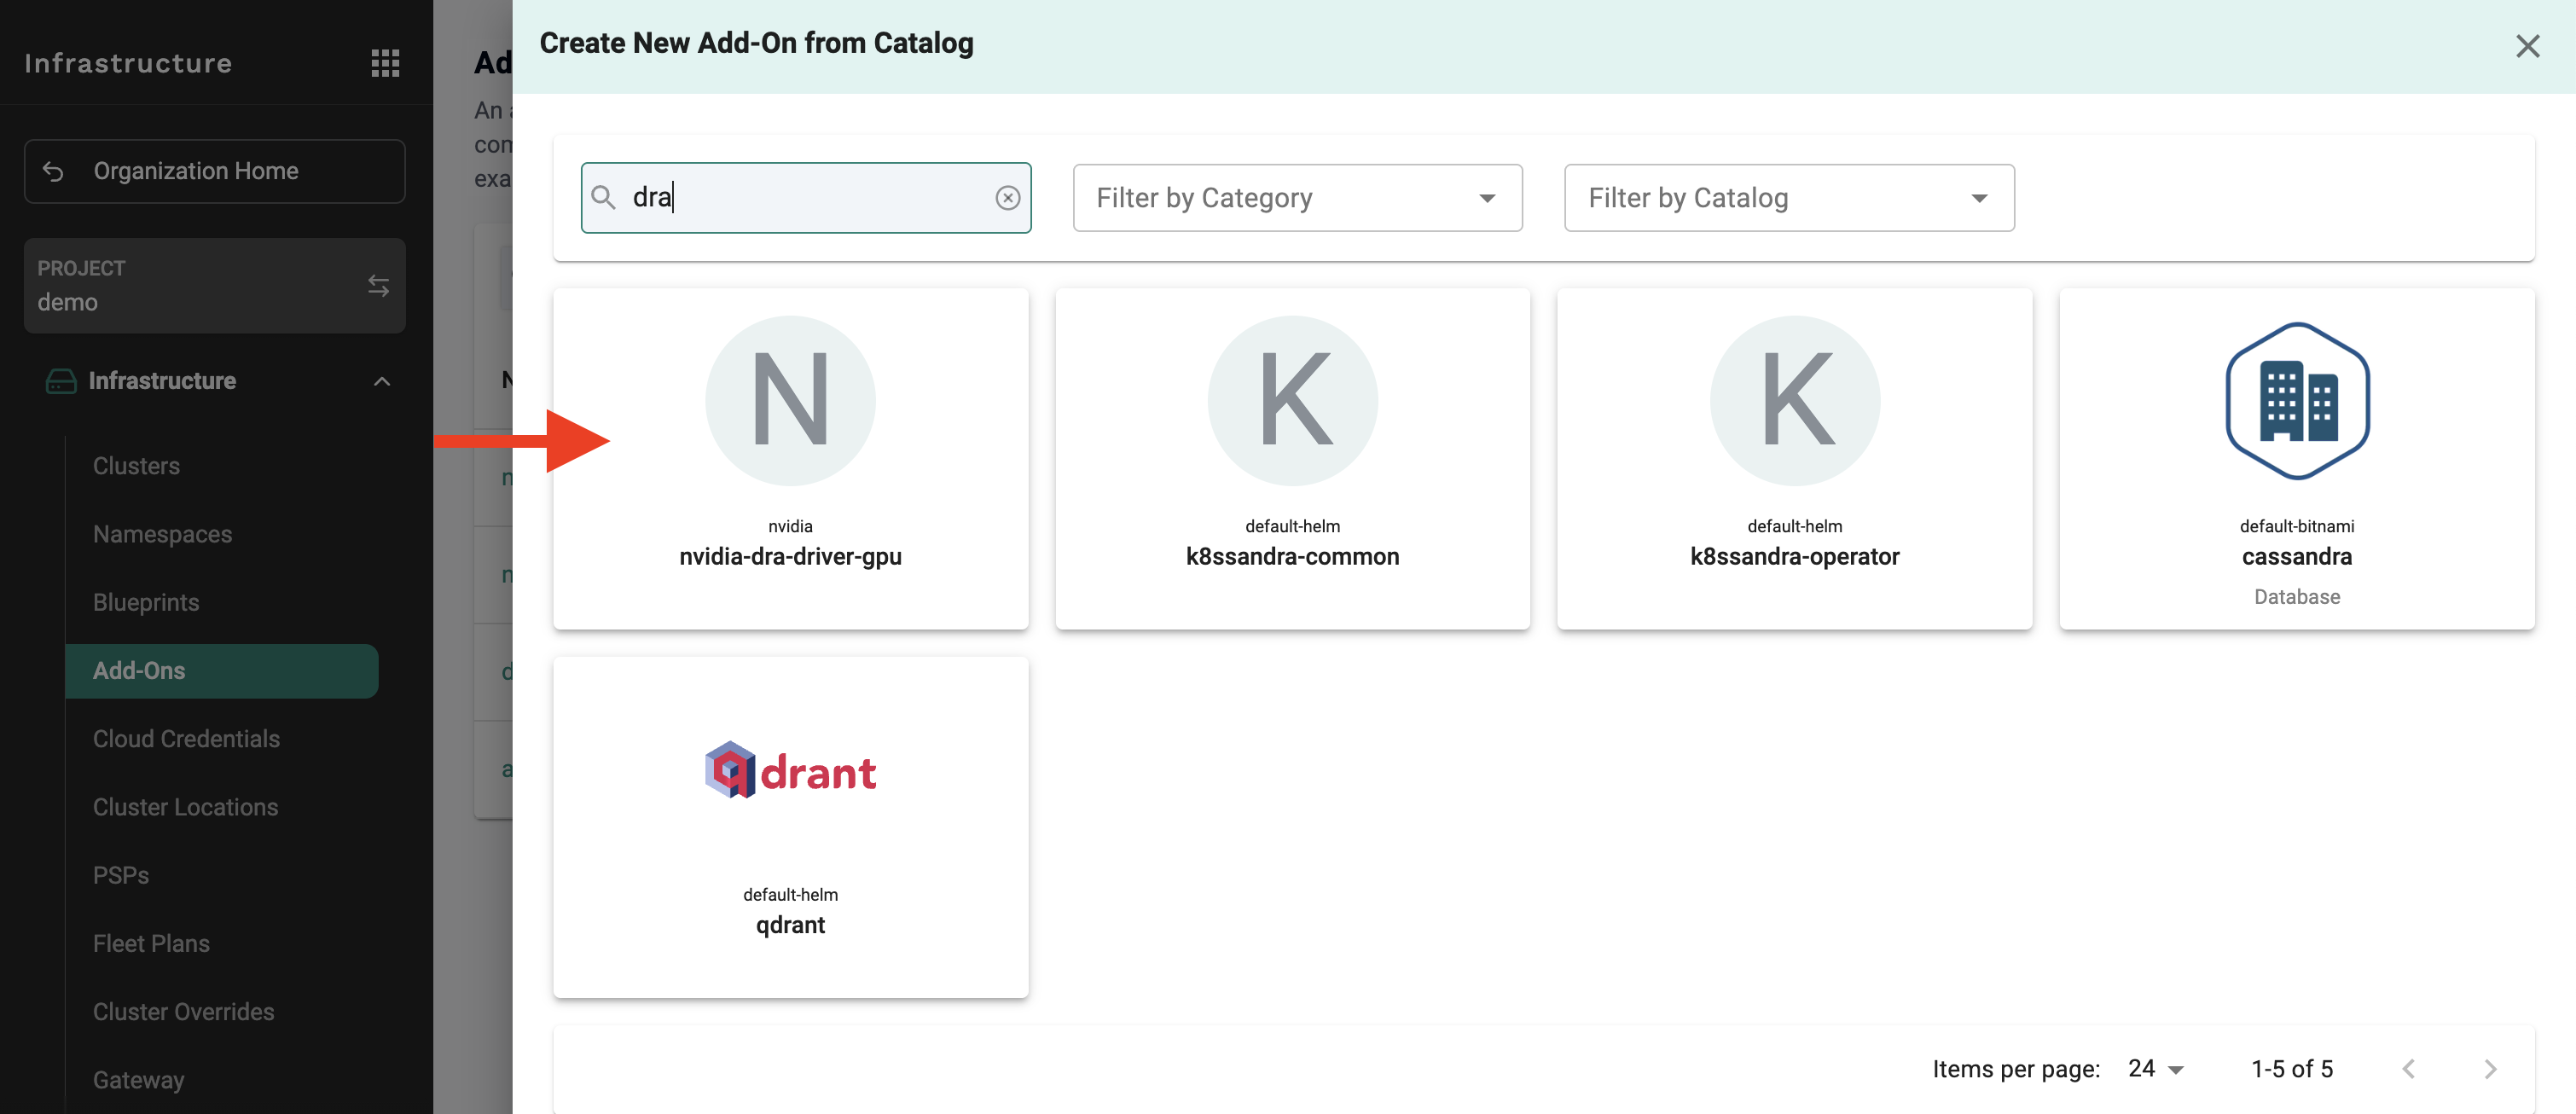
Step 1: Create Addons for DRA and GPU Support
Navigate to Infrastructure > Addons in the Rafay console
Create the DRA Driver Addon:
Search for "dra-driver" in the catalog
This addon provides the core DRA functionality for resource allocation
Create the GPU Operator Addon:
Search for "gpu-operator" in the catalog
This addon manages NVIDIA GPU drivers and MIG configuration
Review and confirm both addons are ready for deployment
Step 2: Create a Blueprint
Navigate to Infrastructure > Blueprints
Create a new blueprint that includes both addons:
DRA Driver addon
GPU Operator addon
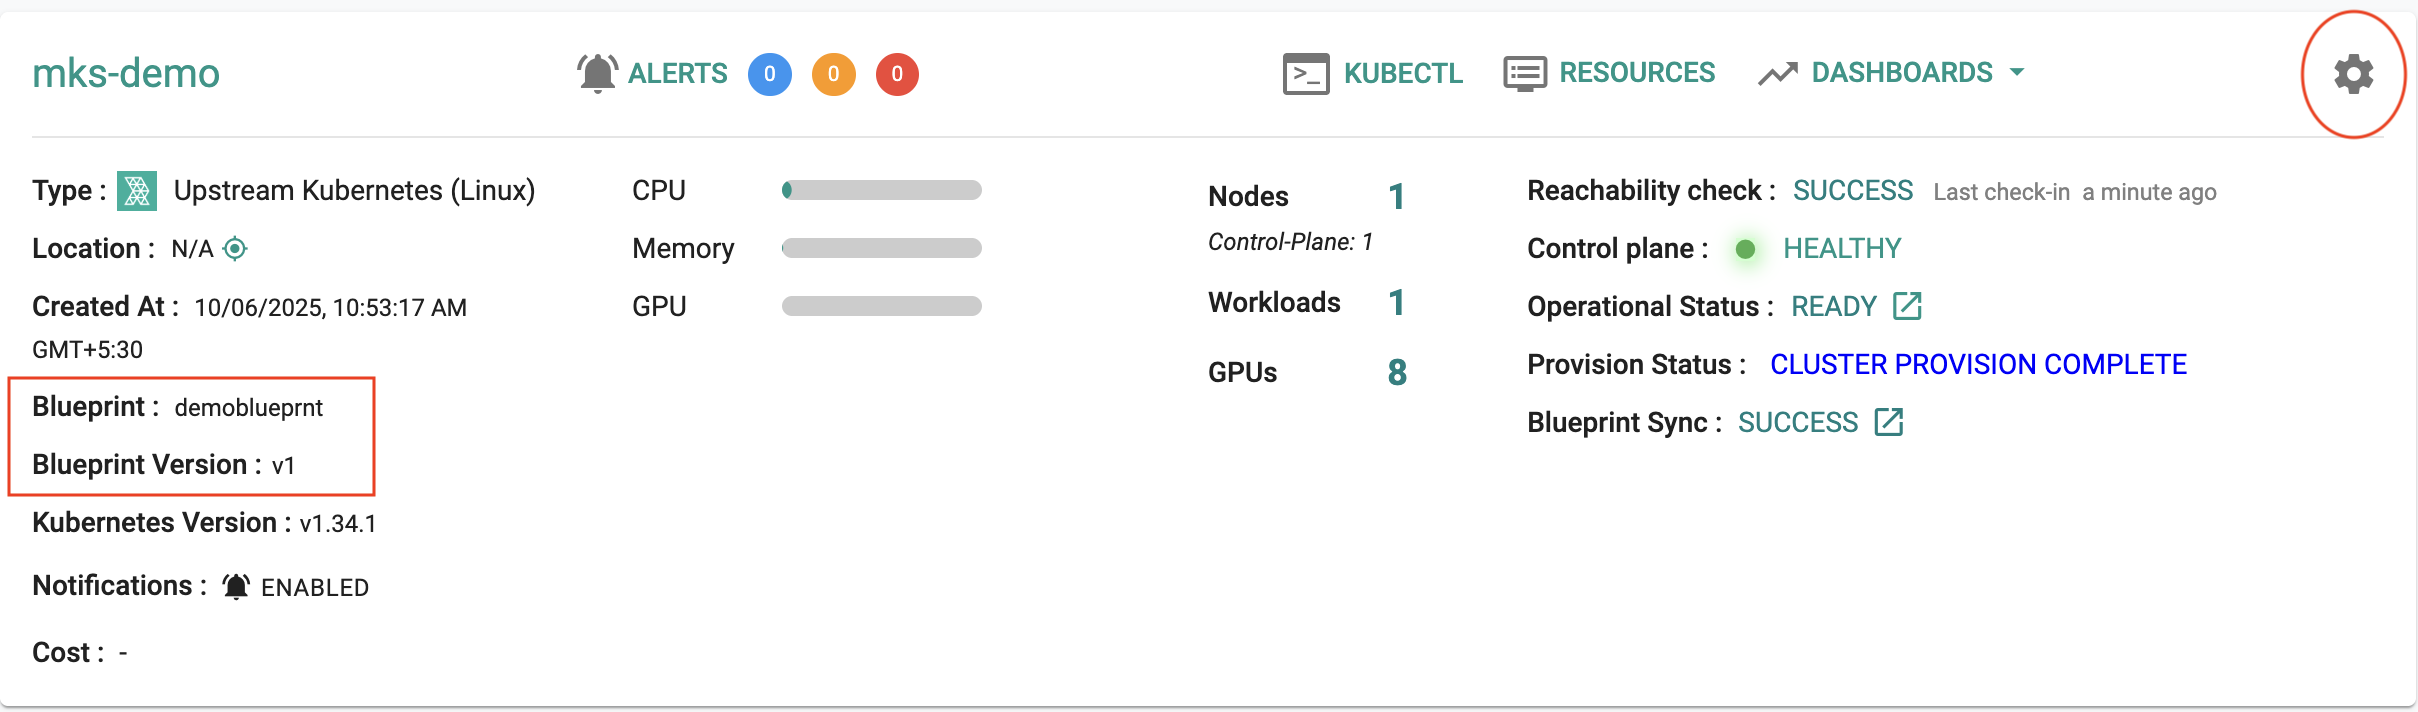
Step 3: Apply Blueprint to MKS Cluster
Navigate to Infrastructure > Clusters
Select your MKS cluster and click the gear icon
Choose "Update Blueprint" from the dropdown menu
Select the blueprint you created in Step 2
Apply the blueprint to deploy the addons
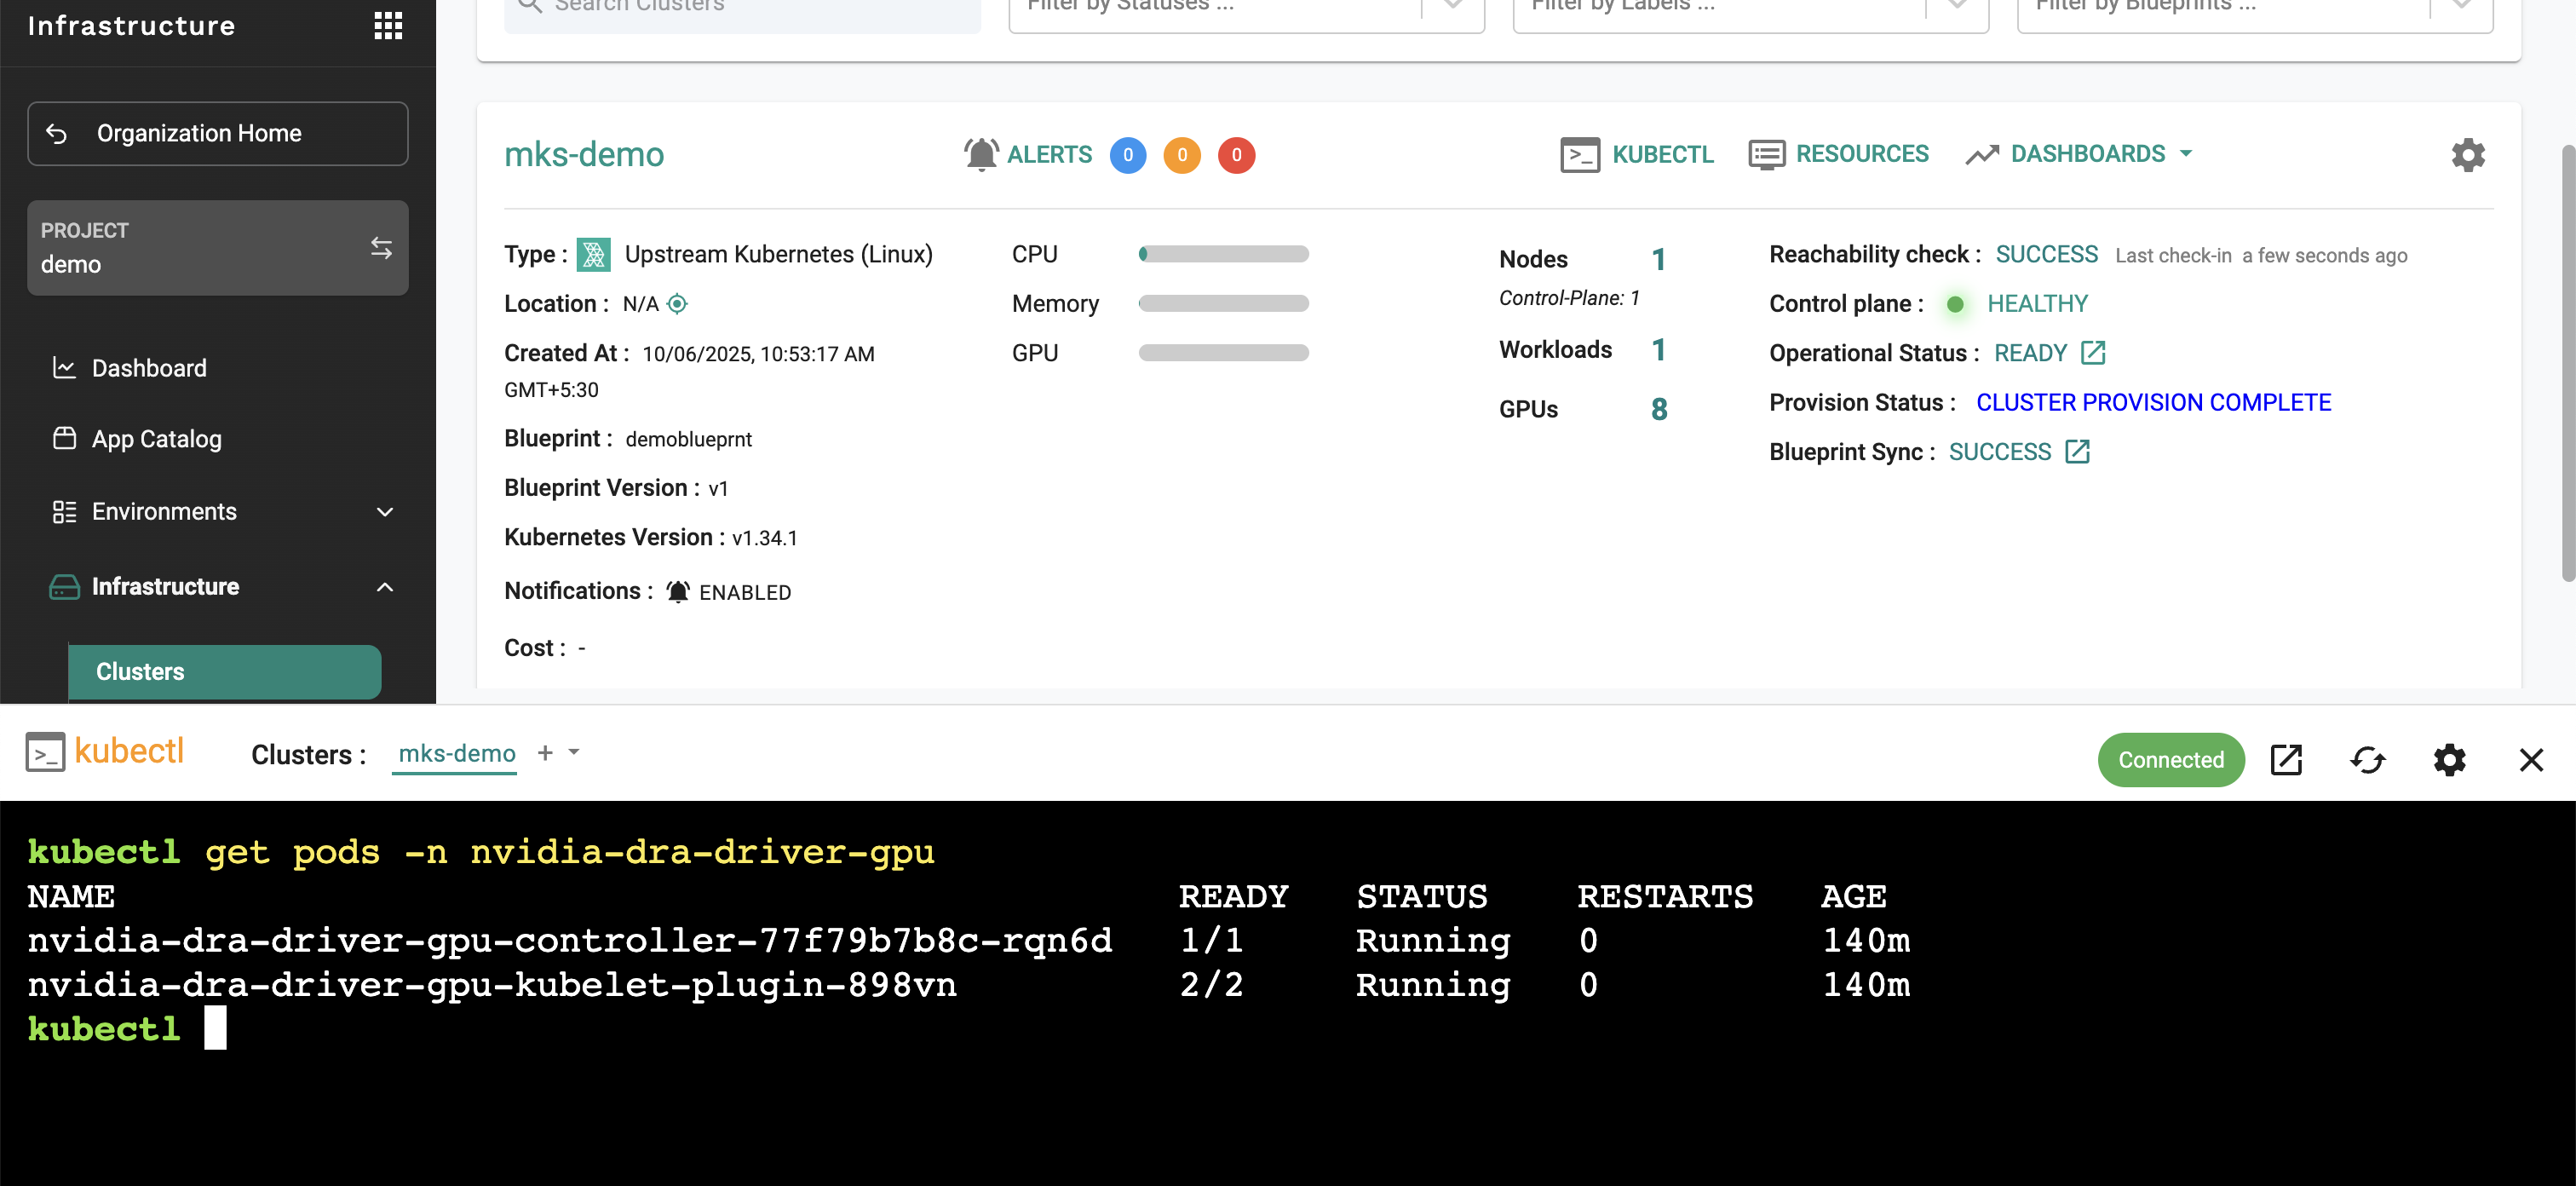
Step 4: Configure Node Labels for DRA Driver
The DRA driver has specific node affinity requirements that determine which nodes it will be deployed to. By default, the DRA kubelet plugin will only be scheduled on nodes that meet one of these criteria:
Default Node Affinity Requirements:
Nodes with feature.node.kubernetes.io/pci-10de.present=true (NVIDIA PCI vendor ID detected by NFD)
Nodes with feature.node.kubernetes.io/cpu-model.vendor_id=NVIDIA (Tegra-based systems)
Nodes with nvidia.com/gpu.present=true (manually labeled GPU nodes)
dra-kubelet-plugin: Handles resource allocation on each node
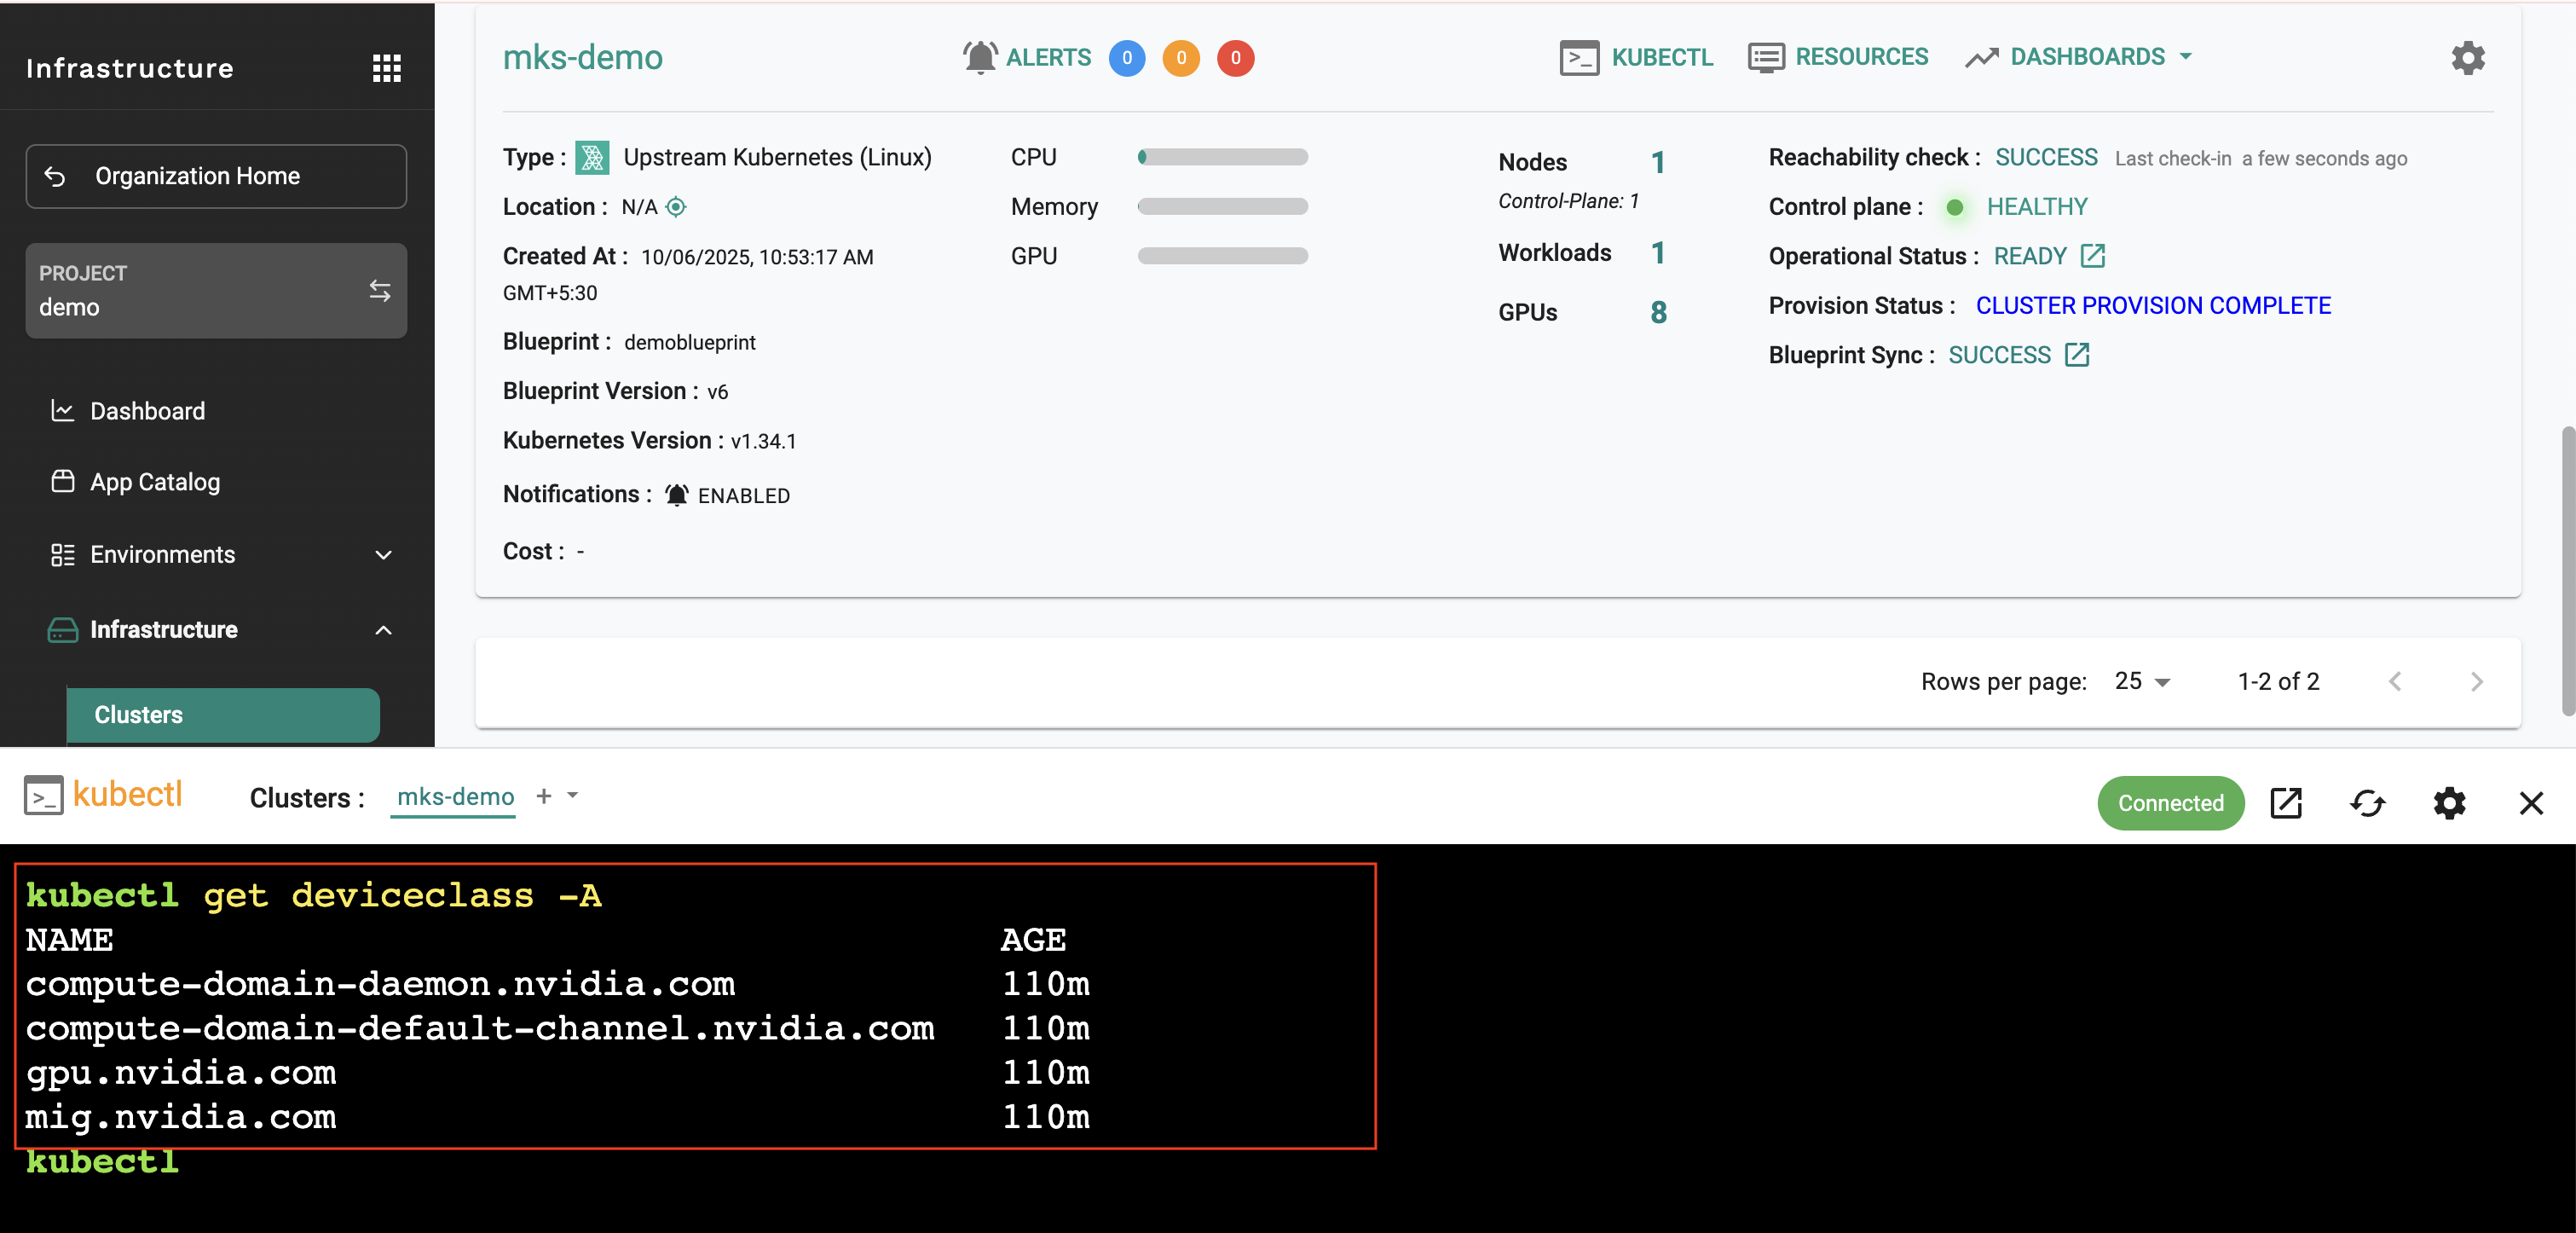
Verify DRA resources are available:
kubectl get deviceclass
kubectl get resourceslices
This confirms that DRA has created the necessary device classes and resource slices for GPU allocation.
Configuring Multi-Instance GPU (MIG)
Before deploying workloads, we need to configure MIG on our GPU nodes. MIG allows us to split a single GPU into multiple smaller instances for better resource utilization.
Step 6: Enable MIG Configuration
1. Label your GPU nodes to enable MIG with the "all-balanced" configuration
kubectl get nodes -l nvidia.com/mig.config=all-balanced
The current DRA driver doesn't support dynamic MIG configuration. You need to statically configure MIG devices using the GPU operator, similar to the traditional device plugin approach.
Now let's deploy a workload that demonstrates how to use DRA with MIG for efficient GPU resource allocation.
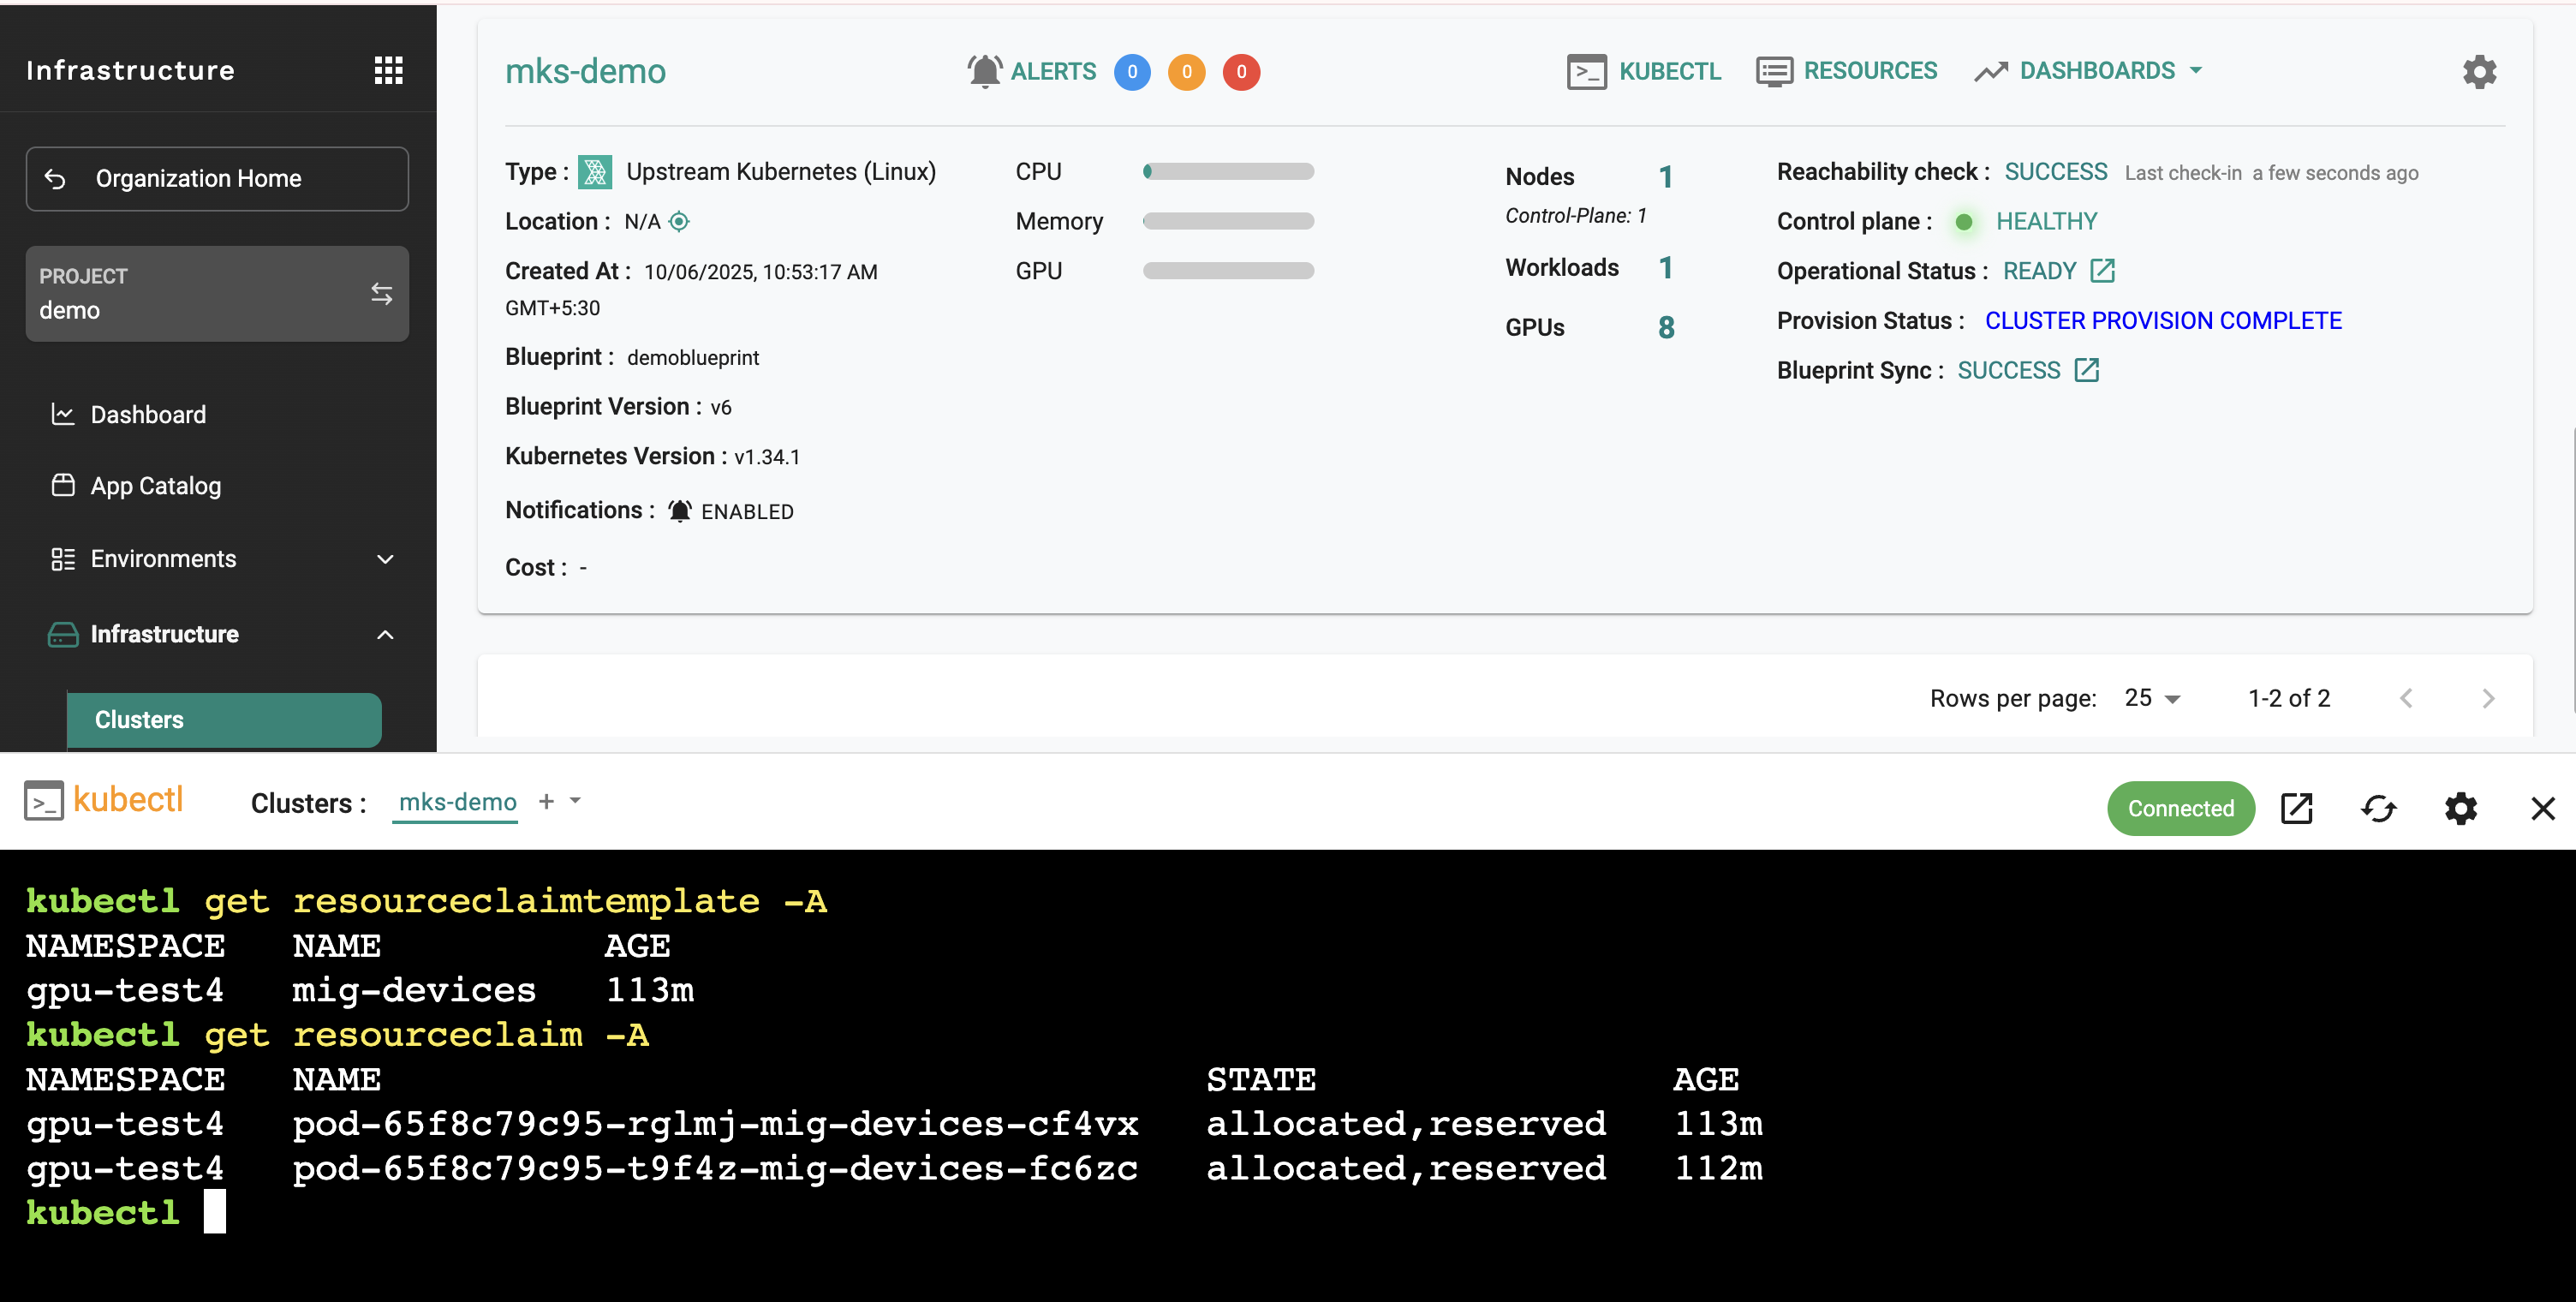
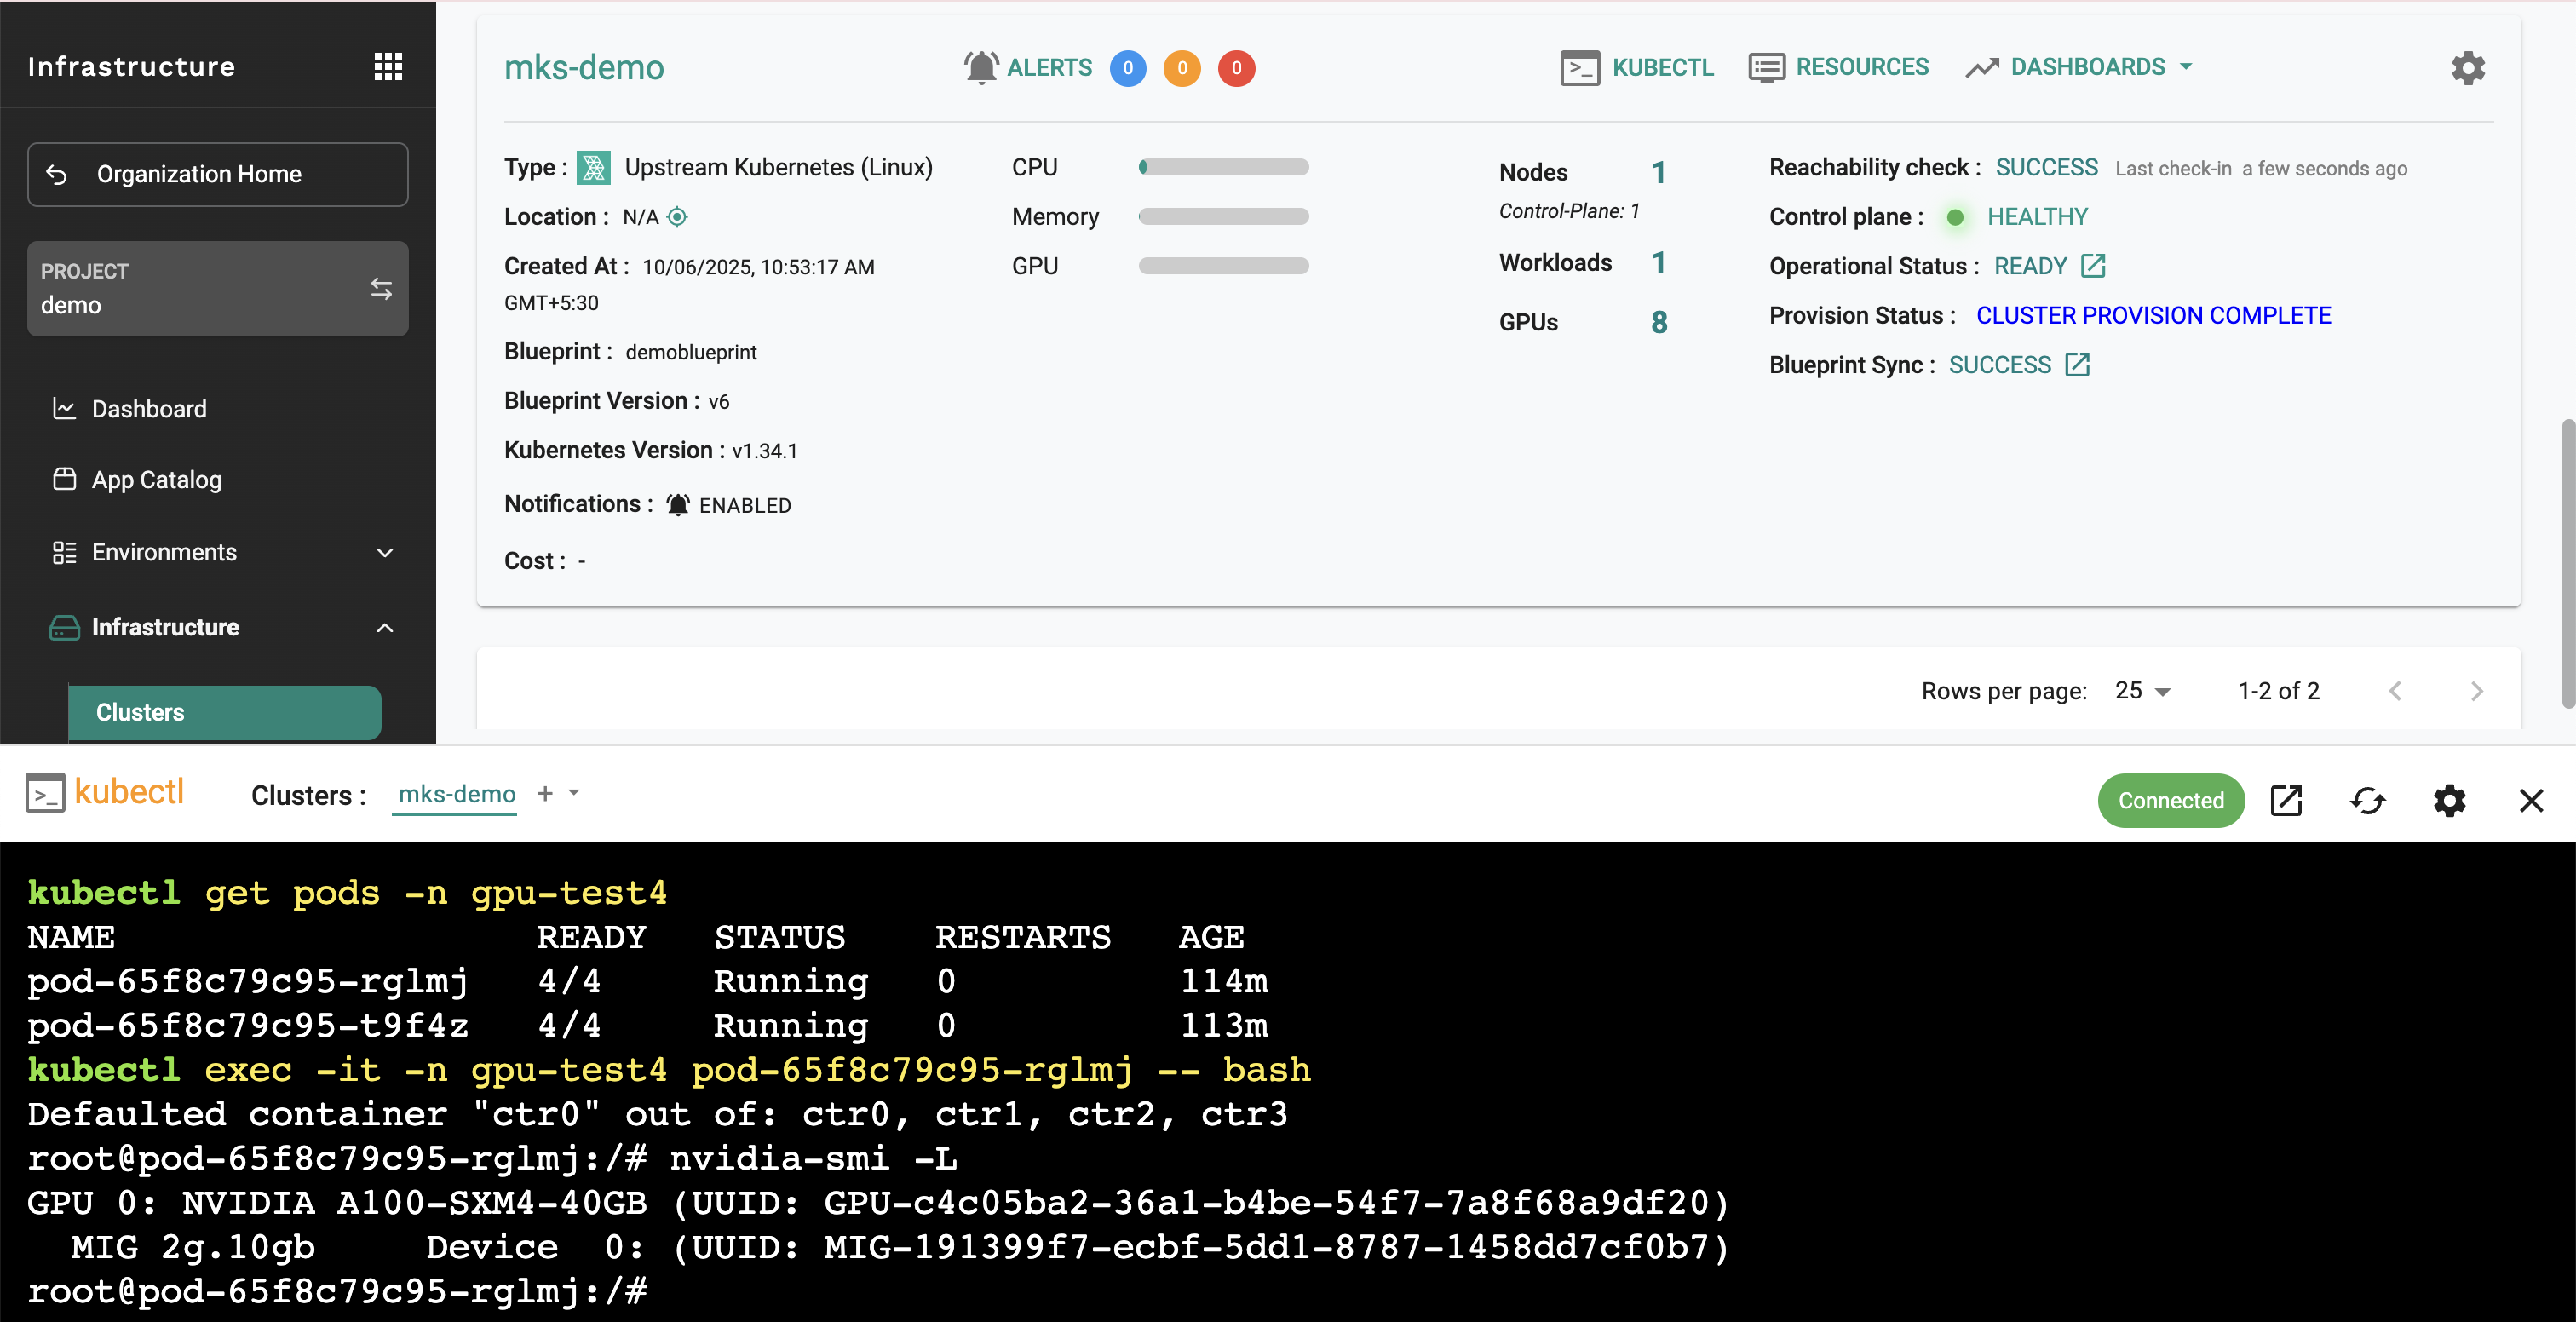
Example: Multi-Container Pod with MIG Allocation
This example demonstrates how to create a single pod with multiple containers, each requesting different MIG instances from the same physical GPU. This showcases the power of DRA + MIG for efficient resource sharing.
What this example does: - Creates 4 containers in a single pod - Each container requests a different MIG profile - All containers share the same physical GPU through MIG - Uses ResourceClaimTemplate for declarative resource allocation
If you don't see the DRA kubelet plugin running on your GPU nodes, check that the node has the required label:
# Check if the label is present
kubectl get nodes --show-labels | grep nvidia.com/gpu.present

# If missing, add the label
kubectl label node <gpu-node-name> nvidia.com/gpu.present=true
The DRA kubelet plugin requires one of these node labels to be scheduled:
nvidia.com/gpu.present=true (manually added)
feature.node.kubernetes.io/pci-10de.present=true (detected by NFD)
Plan MIG profiles based on your workload requirements
Monitor GPU utilization to optimize MIG configurations
Use appropriate tolerations for GPU nodes
Conclusion
This blog demonstrated how to leverage Dynamic Resource Allocation (DRA) with Multi-Instance GPU (MIG) on Rafay's MKS clusters running Kubernetes 1.34.
With DRA now GA in Kubernetes 1.34 and available on MKS, you can start implementing more efficient GPU resource management strategies for your AI/ML workloads today!
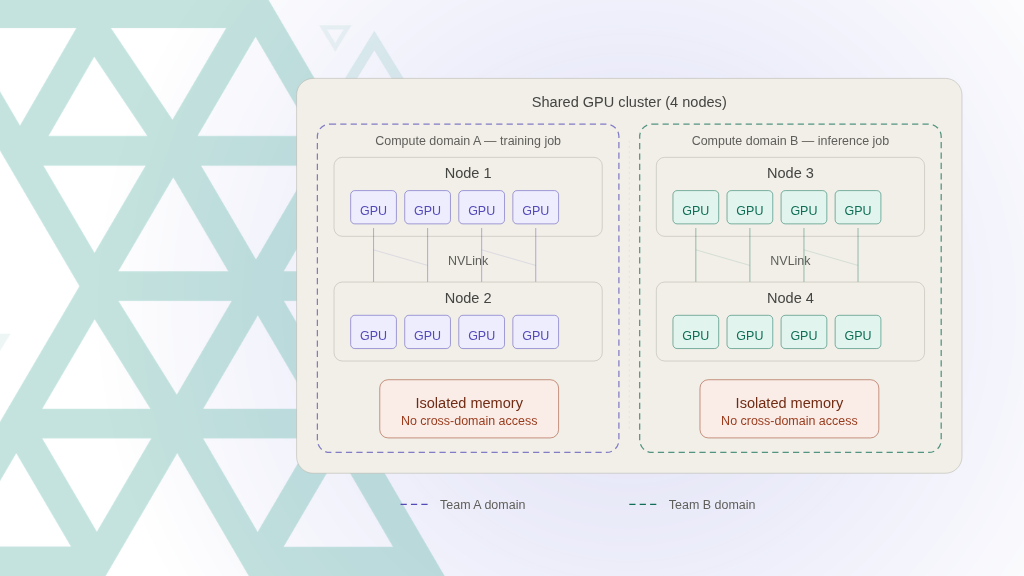
Compute Domains: Bringing Multi-Node NVLink Awareness to Kubernetes
Learn how compute domains and multi-node NVLink enable high-performance, distributed GPU workloads in Kubernetes, improving scalability, resource utilization, and AI infrastructure efficiency.
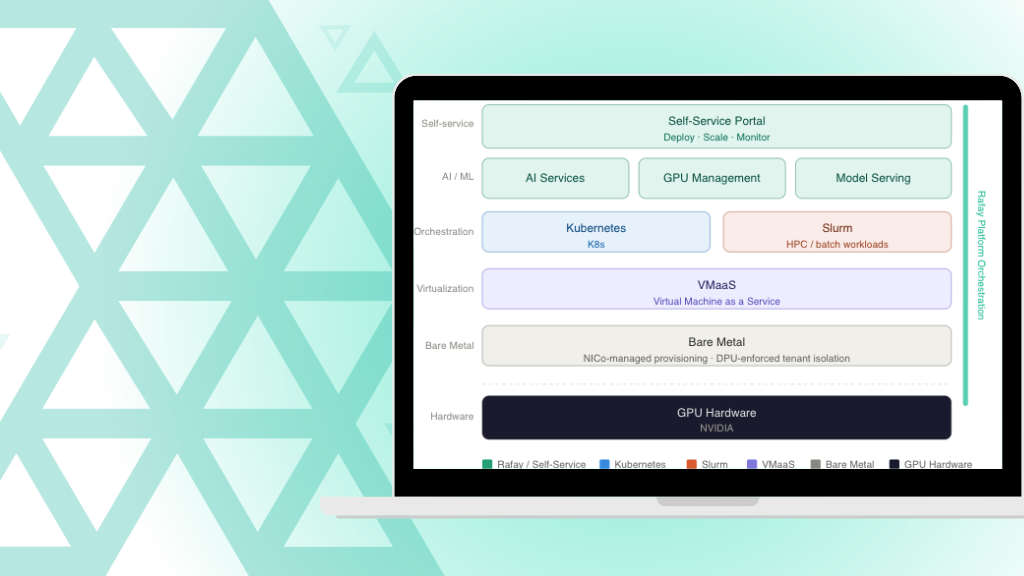
Accelerating the AI Factory: Rafay & NVIDIA NCX Infra Controller (NICo)
Learn how Rafay and NVIDIA NCX Infrastructure Controller (NICO) help enterprises operationalize AI factories—turning GPU infrastructure into scalable, self-service, and governed AI platforms.
.png)